


Are you tired of switching between YouTube에서 Apple Music으로 to enjoy your favorite songs? If so, you're not alone. Many music enthusiasts seek a seamless way to transfer their beloved tracks from YouTube to Apple. In this comprehensive guide, we'll explore different methods to achieve this transfer with ease and an introduction to how to use a third-party Apple Music Unlocker to grab Apple songs.
Whether you prefer third-party applications or manual transfers via iTunes, we've got you covered. Get ready to streamline your music experience and bring all your favorite tracks to Apple Music hassle-free. Let's dive in and unlock the world of unlimited music possibilities!
컨텐츠 가이드 Part #1: Differences between Apple Music And YouTube MusicPart #2: How to Transfer Songs And Playlists from YouTube to Apple Music Using SoundiizPart #3: Transfer YouTube to Apple Music Using FreeYourMusicPart #4: The Best Way to Listen to Your Favorite Tracks결론
Part #1: Differences between Apple Music And YouTube Music
Before we talk about converting YouTube to Apple Music, let’s give the differences of the two. Apple Music and YouTube Music are two popular music streaming platforms, each with its own unique features and offerings. Here is a brief overview of the key differences between Apple Music and YouTube Music:
Content and Catalog:
Apple Music boasts a vast catalog of over 75 million songs, including a wide range of exclusive releases, popular tracks, and extensive music library across various genres. YouTube Music combines official songs, music videos, covers, live performances, and remixes from YouTube's extensive collection. It offers a broader range of content beyond official studio recordings.
플랫폼 통합:
Apple Music is seamlessly integrated into Apple's ecosystem, including iOS devices (iPhone, iPad, iPod Touch), Mac computers, Apple Watch, and Apple TV. It offers a cohesive user experience across these devices. YouTube Music is closely integrated with Google's ecosystem, allowing easy access on Android devices, Google Home speakers, Chromecast, and other Google platforms. It leverages YouTube's familiarity and features for a unified experience.
사용자 생성 콘텐츠:
Apple Music primarily focuses on licensed and official music content, emphasizing professional studio recordings and curated playlists. User-generated content is not a primary component. YouTube Music incorporates user-generated content extensively, providing access to covers, remixes, live performances, and music videos uploaded by creators worldwide. Users can find unique and unofficial renditions of songs.
Music Discovery and Recommendations:
Apple Music offers personalized recommendations and curated playlists through its "For You" section, considering factors like listening habits, genre preferences, and human curation. It emphasizes discovering new music and artists. YouTube Music leverages its vast video catalog to offer personalized music recommendations, including music videos, live performances, and official releases. It places a stronger emphasis on video-based discovery.
Original Content and Exclusives:
Apple Music has exclusive deals with various artists, labels, and music industry professionals, offering exclusive album releases, behind-the-scenes content, documentaries, and artist collaborations. YouTube Music hosts a variety of exclusive content, including live performances, music videos, interviews, and unique collaborations. It also features exclusive releases from popular YouTubers and emerging artists.
These are some of the key differences between Apple Music and YouTube Music. Your choice between the two platforms may depend on factors such as your device ecosystem, preferred content types, music discovery preferences, and access to exclusive releases. Both platforms continue to evolve and enhance their features to provide users with an enjoyable music streaming experience.
Part #2: How to Transfer Songs And Playlists from YouTube to Apple Music Using Soundiiz
In this section, we will explore one of the popular third-party applications, Soundiiz, and learn how to transfer songs and playlists from YouTube to Apple Music seamlessly. Will it be very different from transferring playlists from Spotify to Apple Music, see down below:
Step #1: Sign up for a Soundiiz account:
- Visit the Soundiiz website (soundiiz.com) and create a new account.
- You can choose the free plan, which offers basic features, or consider a premium subscription for additional benefits.
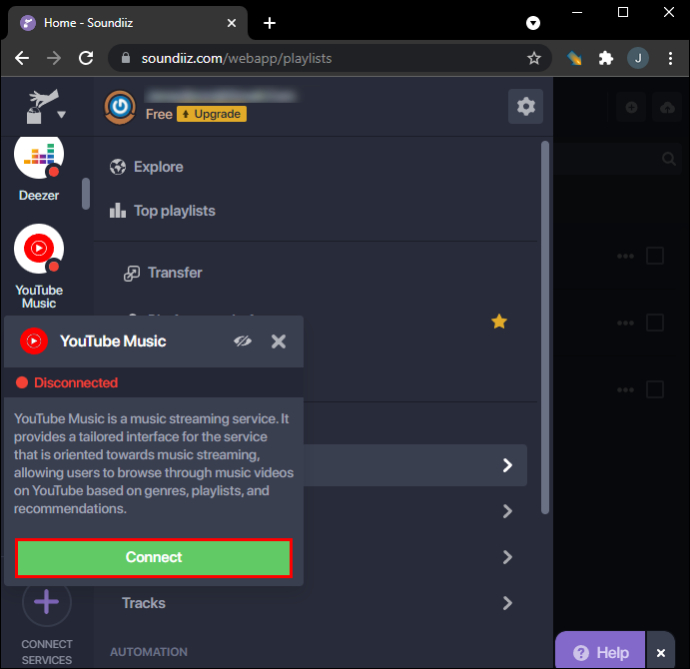
Step #2: Connect your YouTube and Apple Music accounts:
- After signing in to Soundiiz, click on the "플랫폼 " tab or "연결하기 "버튼을.
- Locate YouTube in the list of available platforms and click on it.
- Follow the prompts to log in to your YouTube account and grant Soundiiz access to your data.
- Repeat the same process for Apple Music, connecting your Apple Music account to Soundiiz.
Step #3: Import YouTube playlists to Soundiiz:
- Once your accounts are connected, navigate to the "재생 목록 " section in Soundiiz.
- 에 클릭 "수입 " 버튼을 선택하고 "유튜브 " as the source platform.
- Choose the YouTube playlists you want to transfer to Apple Music and click "확인하기 "나"수입 ".
Step #4: Transfer playlists to Apple Music:
- After importing the YouTube playlists, go to the "재생 목록 " section again.
- Locate the imported YouTube playlist and click on the XNUMX 점 메뉴 아이콘.
- 드롭다운 메뉴에서 "Convert to Apple Music " 또는 이와 유사한 옵션입니다.
- Soundiiz will initiate the transfer process, converting the YouTube playlist to a compatible format for Apple Music.
Step #5: Confirm the transfer in Apple Music:
- Open your Apple Music app or access the Apple Music website.
- Look for the newly transferred playlist, which should now be available in your Apple Music library.
Congratulations! You have successfully transferred your YouTube playlist to Apple Music using Soundiiz. Repeat these steps for each playlist or song transfer you want to perform. Remember, Soundiiz offers various additional features, including bulk transfers, advanced playlist management, and synchronization between multiple music platforms. Explore the Soundiiz interface and settings to customize your transfer experience further.
Part #3: Transfer YouTube to Apple Music Using FreeYourMusic
To transfer songs from YouTube to Apple Music using FreeYourMusic, follow the steps below:
Step #1: Download and Install FreeYourMusic:
- Visit the FreeYourMusic website and download the application compatible with your operating system (Windows or macOS).
- Once the download is complete, run the installer and follow the on-screen instructions to install FreeYourMusic on your computer.
Step #2: Launch FreeYourMusic:
- After the installation is complete, launch the FreeYourMusic application.
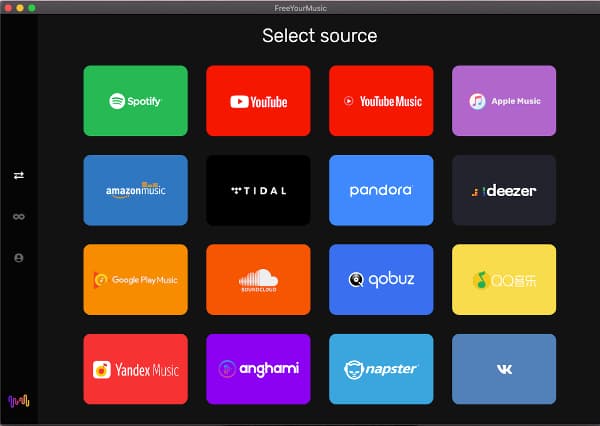
Step #3: Connect YouTube and Apple Music Accounts:
- In FreeYourMusic, you'll see a list of supported music platforms. Select YouTube as the source platform.
- Follow the prompts to log in to your YouTube account and grant FreeYourMusic access to your YouTube library.
- Next, select Apple Music as the destination platform.
- Log in to your Apple Music account using your Apple ID and password.
Step #4: Select Songs or Playlists to Transfer:
- FreeYourMusic will analyze your YouTube library and display all your playlists and songs.
- Choose the playlists or individual songs you want to transfer from YouTube to Apple.
Step #5: Start the Transfer Process:
- Once you've made your selections, click on the "토큰 전송 "나"전송 시작 " button in FreeYourMusic.
- The transfer process will begin, and FreeYourMusic will convert and transfer the selected songs or playlists from YouTube to Apple.
Step #6: Check the Transferred Songs on Apple Music:
- After the transfer is complete, open the Apple Music app on your device.
- Navigate to your library or playlists to find the transferred songs or playlists from YouTube.
FreeYourMusic simplifies the process of transferring songs from YouTube to Apple, ensuring a smooth transition of your favorite tracks. Remember to review FreeYourMusic's features and terms of service, as well as any associated costs, to make the most of the application's capabilities.
Part #4: The Best Way to Listen to Your Favorite Tracks
Now that you’ve learned about how to transfer songs from YouTube에서 Apple Music으로, we will give a recommendation of a bonus tool. 애플 뮤직 언락커 by iOS Unlocker is a software that can be used to remove DRM protection from Apple Music songs and convert them to MP3, WAV, FLAC, or other popular audio formats.
이것은 당신이 할 수 있습니다 listen to your Apple Music songs on a portable device like iPod, even if it doesn't support DRM-protected files.
Apple Music Unlocker is easy to use. Simply connect your iPhone or iPad to your computer, launch the software, and select the songs you want to convert. The software will then remove the DRM protection from the songs and save them in the format you selected.
Apple Music Unlocker is a powerful tool that can be used to free your Apple Music songs from DRM protection. If you want to listen to your Apple Music songs on any device, then Apple Music Unlocker is the software for you.
Here are some of the features of Apple Music Unlocker:
- Apple 음악 노래에서 DRM 보호를 제거하십시오.
- Convert Apple Music songs to MP3, AAC, WAV, FLAC, or other popular audio formats.
- 사용하기 쉬운.
- Windows 및 Mac과 호환됩니다.
Here are some of the benefits of using Apple Music Unlocker:
- You can listen to your Apple Music songs on any device, even if it doesn't support DRM-protected files.
- You can save space on your device by converting your Apple Music songs to a smaller file format.
- You can share your Apple Music songs with others without having to worry about DRM restrictions.
사용 단계는 다음과 같습니다.
- Once you have installed and logged into iTunes on your computer, launch the Apple Music Unlocker software. From the software's main interface, locate and click on the option that says "Apple 웹 플레이어를 엽니다. ".
- In the upper right corner of the window, you will find a "로그인 " button. Click on it to sign in with your Apple ID credentials.
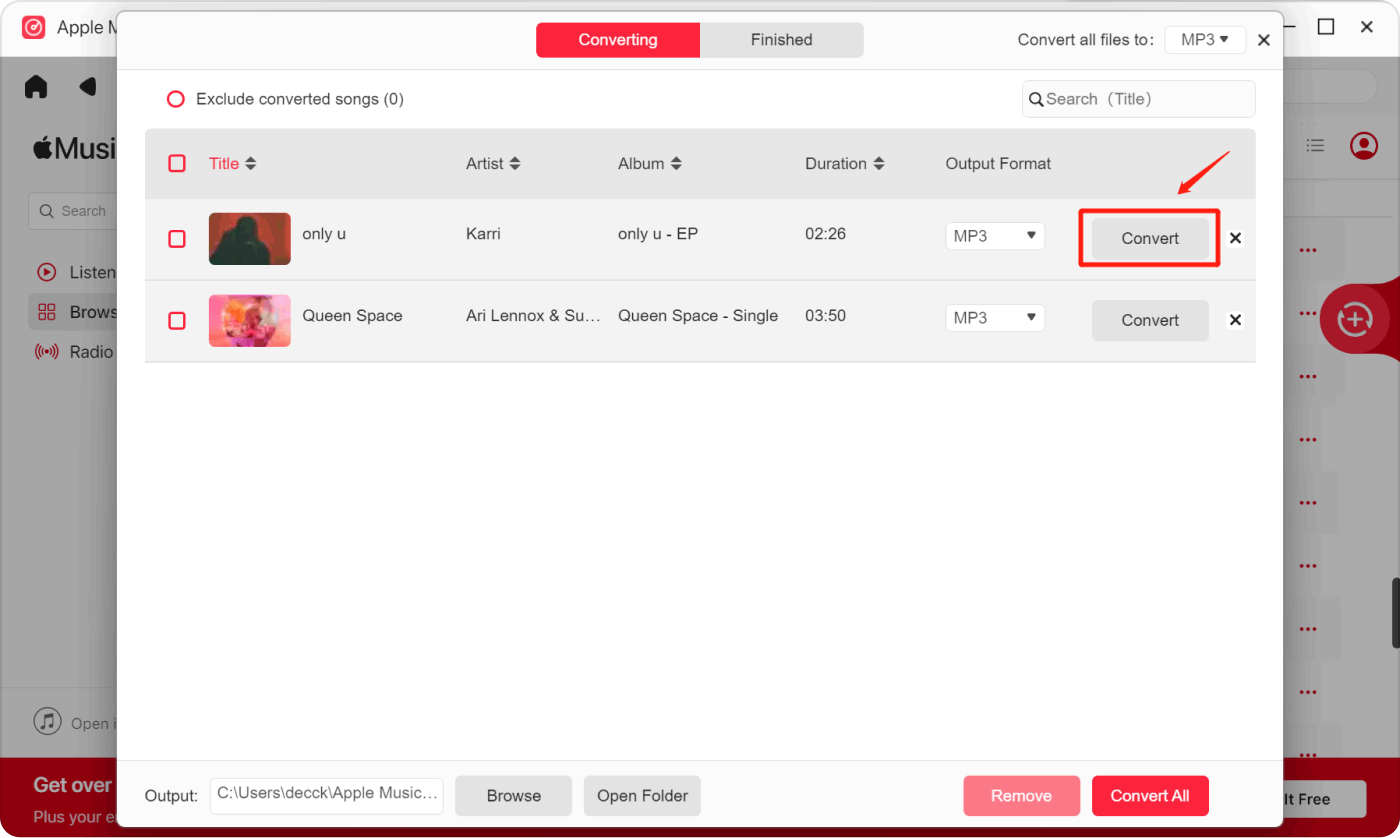
- To select a specific song or playlist, simply drag and drop the song title or playlist title onto the red add icon. Alternatively, if you wish to add all songs from a playlist, open the playlist and click on the 빨간 더하다 상징.
- Now, choose the desired output format for your converted files. You have options such as MP3, M4A, WAV, or FLAC. If you prefer to change the output folder location, you can do so at this stage to specify where the converted files will be saved.
- Finally, from the interface, select either "개 심자 "나"모두 변환 " 변환 프로세스를 시작합니다.
사람들은 또한 읽습니다 Spotify에 YouTube Music을 추가하는 방법: 단계별 가이드 프리미엄 구독 없이 유튜브 뮤직을 다운로드하는 방법: 주요 방법
결론
If you're looking for a way to remove DRM protection from your Apple Music songs, then Apple Music Unlocker is the software for you. It's easy to use, affordable, and compatible with all major operating systems. With these extra bonus songs and those from YouTube에서 Apple Music으로, surely you will have a brilliant listening experience.
Rosie 작성
최종 업데이트 : 2023 년 05 월 25 일