


As the streaming industry continues to evolve, many music enthusiasts find themselves considering a change in their preferred music streaming service. Whether you're drawn to Spotify's personalized playlists, collaborative features, or vast music library, the thought of starting from scratch with a new platform may seem daunting. Fortunately, with the right tools and knowledge, the process to transfer Apple Music to Spotify 산들 바람이 될 수 있습니다.
당신은 방법을 알고 있을지도 모릅니다. transfer songs or playlists from Spotify to Apple Music, then what about the opposite? In this article, we'll explore the seamless process of transferring your Apple Music library and playlists to Spotify, ensuring that you can enjoy your favorite tunes without missing a beat. So, let's dive in and discover how you can effortlessly migrate your music from Apple to Spotify!
컨텐츠 가이드 Part #1: How to Transfer Apple Music to Spotify Manually without ToolsPart #2: The Best Way to Listen to Apple Music TracksPart #3: Best Way to Transfer Apple Music to Spotify after Using Apple Music Unlocker결론
Part #1: How to Transfer Apple Music to Spotify Manually without Tools
While using a tool like TuneMyMusic can simplify the way to transfer Apple Music to Spotify, some users may prefer a manual approach. In this third part of our series, we will guide you through the steps to transfer your Apple Music to Spotify manually, without relying on any external tools. Although this method requires more effort, it provides you with complete control over the transfer process. So, let's get started!
Step #1: Create A Spotify Account
아직 가지고 있지 않다면 스포티 파이 account, the first step is to create one. Visit the Spotify website or download the app and sign up by providing the required information. Once you have successfully registered, log in to your new Spotify account.

Step #2: Make A List of Your Apple Music Library And Playlists
To ensure a smooth transfer, it's essential to have a clear overview of your Apple Music library and playlists. Make a note of the songs and playlists you wish to transfer, as you will need this information throughout the process.
Step #3: Search And Add Songs to Spotify Library
Using your Apple Music library list, search for the corresponding songs on Spotify. Spotify has an extensive music library, so you should be able to find most, if not all, of your favorite tracks. Once you find a song, add it to your Spotify library by clicking the "+" button next to the track.
Step #4: Recreate Playlists on Spotify
To transfer Apple Music to Spotify, you'll need to recreate them manually. Start by creating a new playlist on Spotify with the same name as your Apple Music playlist. Then, go through your Apple Music playlist and search for each song on Spotify, adding them to the respective Spotify playlist you just created.
Step #5: Verify And Organize Your Spotify Library
Once you have added all the desired songs and recreated your playlists on Spotify, take some time to verify and organize your Spotify library. Double-check that all the songs you intended to transfer are present and that your playlists are complete. You can rearrange your playlists, add album art, and make any necessary adjustments to ensure your Spotify library reflects your musical preferences accurately.
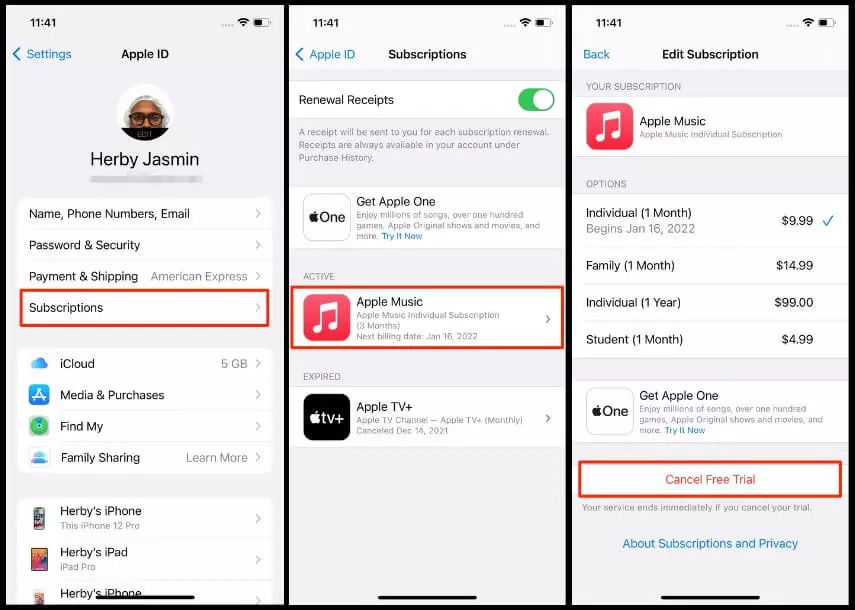
Step #6: Remove Apple Music from Devices And Cancel Subscription
After successfully transferring your music to Spotify, it's time to tidy up your 애플 음악. Remove Apple Music from any devices you no longer wish to use it on. If you have an Apple Music subscription, consider canceling it to avoid any unnecessary charges.
Step #7: Enjoy Your Music on Spotify
Congratulations! You manually transfer Apple Music to Spotify. Now, you can enjoy all your favorite tracks on Spotify's platform, take advantage of its features, discover new music, and share your playlists with friends.
While using a dedicated tool can streamline the process, manually transferring your Apple Music library to Spotify is a viable option for those who prefer a hands-on approach. By following the steps outlined in this article, you can successfully migrate your music collection and playlists without relying on external tools.
Take the time to curate your Spotify library, recreate your playlists, and organize your music to ensure a seamless transition. So, embrace the manual transfer method, and embark on a new musical journey with Spotify today.
Part #2: The Best Way to Listen to Apple Music Tracks
애플 뮤직 언락커 is a powerful software designed to help users easily convert and transfer their Apple Music files to various formats, including MP3, M4A, FLAC, and more.
This dedicated tool offers a convenient solution for those who want to enjoy their Apple Music tracks on non-Apple devices or platforms that may not support Apple's proprietary format. Just the purpose we want – To transfer Apple Music to Spotify.
One of the standout features of the tool is its ability to preserve the original audio quality while converting the Apple songs files to MP3 or any other format. This ensures that users don't compromise on the sound quality of their favorite tracks during the conversion process.
The software also boasts a user-friendly interface, making it accessible to both beginners and experienced users. Its intuitive design allows users to navigate through the software and convert their Apple Music files with ease. Additionally, Apple Music Unlocker supports batch conversion, allowing users to convert multiple tracks simultaneously, saving time and effort.
Another notable feature is its ability to retain the metadata information of the Apple Music files, such as artist name, album title, genre, and album art. This ensures that the converted files maintain their organization and information when transferred to other devices or platforms.
Apple Music Unlocker is compatible with both Windows and Mac operating systems, offering wide accessibility to users across different platforms. It is regularly updated to keep up with changes in Apple's encryption methods, ensuring its compatibility with the latest Apple Music updates.
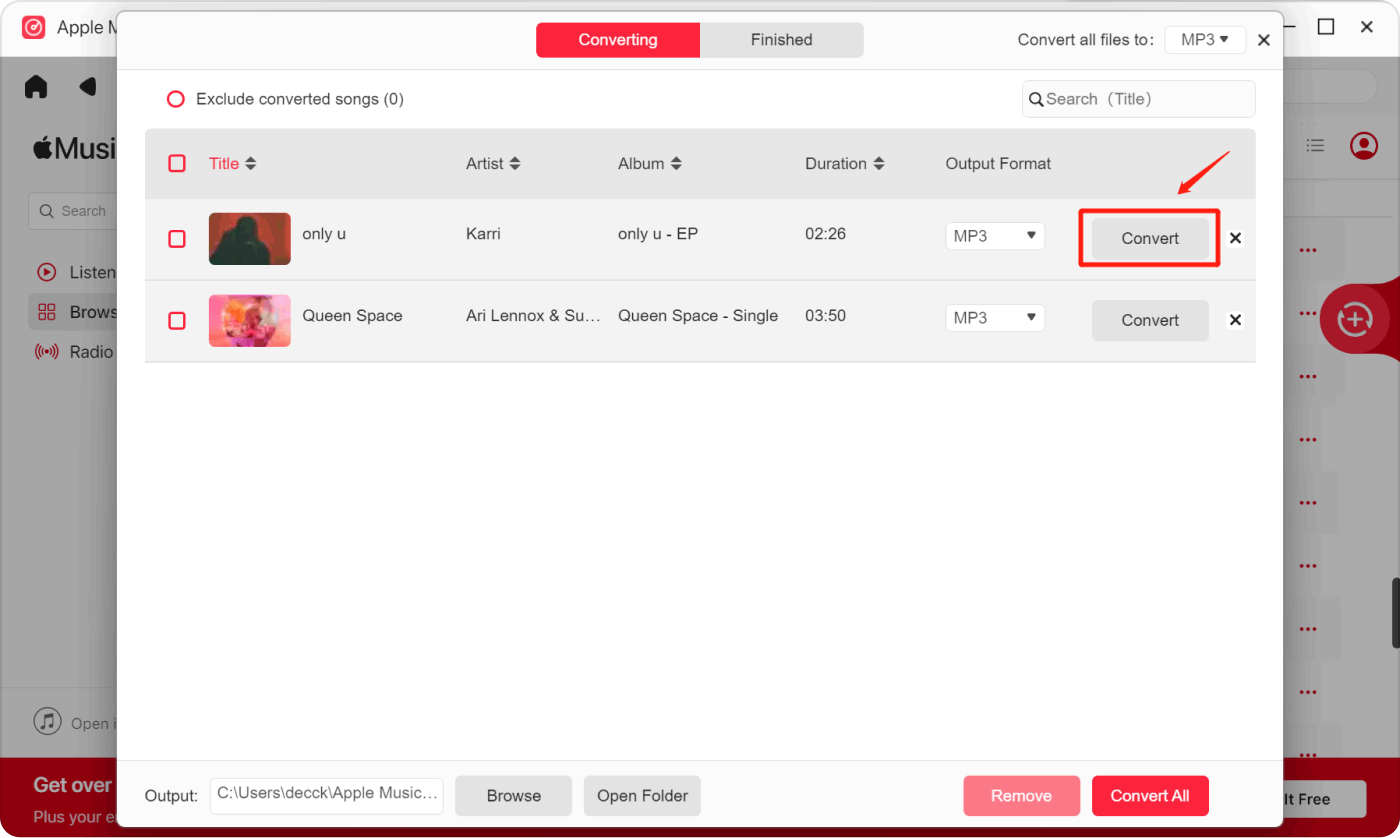
사용 단계는 다음과 같습니다.
- Install and sign in to iTunes.
- 온 클릭 "Apple 웹 플레이어를 여세요" 버튼을 클릭합니다.
- Apple ID와 비밀번호를 입력하십시오.
- Drag and drop songs or playlists to the red add icon.
- 드롭다운 메뉴에서 출력 형식을 선택하세요.
- (선택 사항) Change the output folder location by clicking on the "변화" 버튼을 클릭합니다.
- 온 클릭 "변환" 또는 "모두 변환" 버튼을 눌러 변환을 시작합니다.
Part #3: Best Way to Transfer Apple Music to Spotify after Using Apple Music Unlocker
After you have the MP3 files from Apple Music using Apple Music Unlocker, you can transfer Apple Music to Spotify account using the upload feature of Spotify.
Here are the steps on how to upload your local MP3 files to Spotify from your computer:
- Spotify 데스크톱 앱을 엽니다.
- 온 클릭 톱니 바퀴 아이콘 in the top-right corner of the app.
- 클라임웍스와 함께 하늘과 닿는 여정을 시작하세요 설정.
- 아래로 스크롤하여 로컬 파일 안내
- 토글 로컬 파일 표시 켜짐으로 전환합니다.
- If you want to import audio files from another folder, select 소스 추가.
- From the pop-up browser, select the folder you want to add to Spotify, then click OK.
- Once the files have been added, you can find them in the Local Files section of your library.
- You can create a playlist with your local files, or you can drag and drop them into other playlists.

사람들은 또한 읽습니다 Apple Music에서 노래가 다운로드되지 않을 때 문제 해결 방법: 주요 해결 방법 iPod에서 Apple Music을 재생하는 방법: 포괄적인 가이드
결론
Overall, Apple Music Unlocker provides a convenient and efficient way to transfer Apple Music to Spotify and other various formats, allowing users to enjoy their favorite tracks on a wider range of devices and platforms. With its user-friendly interface, high-quality conversions, and support for metadata retention, Apple Music Unlocker stands as a reliable solution for users seeking flexibility with their Apple Music files.
Rosie 작성
최종 업데이트 : 2023 년 06 월 07 일