


“I couldn’t get my iPhone connected to iTunes it says "iTunes Could Not Connect To This iPhone Because It Is Locked With A Passcode ". I did not set up a passcode yet, what do I do?”
Part 1. Check and Remove Your Synced iTunes Devices Part 2. Reinstall or Update iTunesPart 3. Put iPhone in Recovery Mode and UpdatePart 4. Use an Efficient iPhone UnlockerPart 5. Bonus Tips When Creating a PasscodePart 6. Summary
Part 1. Check and Remove Your Synced iTunes Devices
There are no limits when it comes to the number of iOS devices that you can use to connect to iTunes. However, you can only use 5 computers maximum under one registered account.
Every iOS device that you link to your iTunes library will have its own set of synchronization settings. But sometimes, having too many devices connected to iTunes may cause confusion and even interruptions. You can always remove the old devices in iTunes to clear them out and ensure that all the devices listed get their own time to shine.
Here’s how to remove the old devices in iTunes:
- Launch iTunes on your computer
- Navigate to Account
- Enter your Apple ID and password
- Click View My Account
- Go to Download and Purchases
- Select Manage Devices
- Delete the old devices synced with iTunes
- Relaunch iTunes
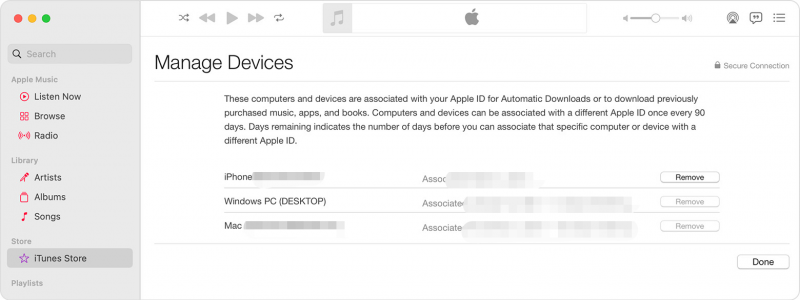
Now, remember that when you remove an old device in iTunes, be sure to check the data stored in it because it will get deleted too.
Part 2. Reinstall or Update iTunes
If you are using a Windows computer and you think that the issue lies within iTunes, you can always reinstall or update it at any time.
Follow these steps on how to reinstall iTunes on a Windows computer:
- Press Windows key and then the Letter + X and find Control Panel
- Open Programs and Features
- Navigate to iTunes and click Uninstall
- Restart the computer
- Go to the Apple website and navigate to the download iTunes page
- Follow the on-screen installation guide
After you have reinstalled iTunes, connect your iPhone and check if the issue has been resolved.
Another option you can do is to check for an iTunes update. Always make it a habit to update your iTunes every time you open since incompatible devices might cause connection issues such as “iTunes could not connect to this iPhone because it is locked with a passcode ”
To update your iTunes, simply launch the program, navigate to Help from the menu bar on top of the iTunes window. Click Check for Updates. Just follow the update process on screen.
Part 3. Put iPhone in Recovery Mode and Update
Now if reinstalling and updating iTunes doesn’t work, the next thing you can do is to place your iPhone into recovery mode.
Placing your iPhone in recovery mode will enable iTunes or Finder to fix the iTunes could not connect to this iPhone because it is locked with a passcode problem. Simply force restart your iPhone and click Update from the pop-up window.
There are two options you can choose from when you put your iPhone into recovery mode. It will let you Update or Restore your device.
Updating will just reinstall the firmware package without losing any data. However, you must consider that the Restore option will delete all the information stored on the iPhone. You should take a backup prior to doing this troubleshooting method, otherwise, you will experience data loss.
Check this guide on how to perform a recovery mode and Update your iPhone:
- Close iTunes if it is currently open
- Connect the iPhone via USB and then launch iTunes again
- Do a Force Restart on the iPhone. Press and hold the Volume Up and then do the same with the Volume Down. Also, press and hold the Side button until a pop-up window appears on the iTunes screen
- Click Update on the pop-up screen
- Wait until the process is complete before disconnecting your device
You can now check to see if the “iTunes Could Not Connect To This iPhone Because It Is Locked With A Passcode” issue has been resolved.
Part 4. Use an Efficient iPhone Unlocker
Technically, if you still get the error “iTunes could not connect to this iPhone because it is locked with a passcode ” after trying the above solutions, your device might have set up a passcode previously. This is highly possible if you are using an old iPhone or a used one, perhaps, the previous owner has created a passcode.
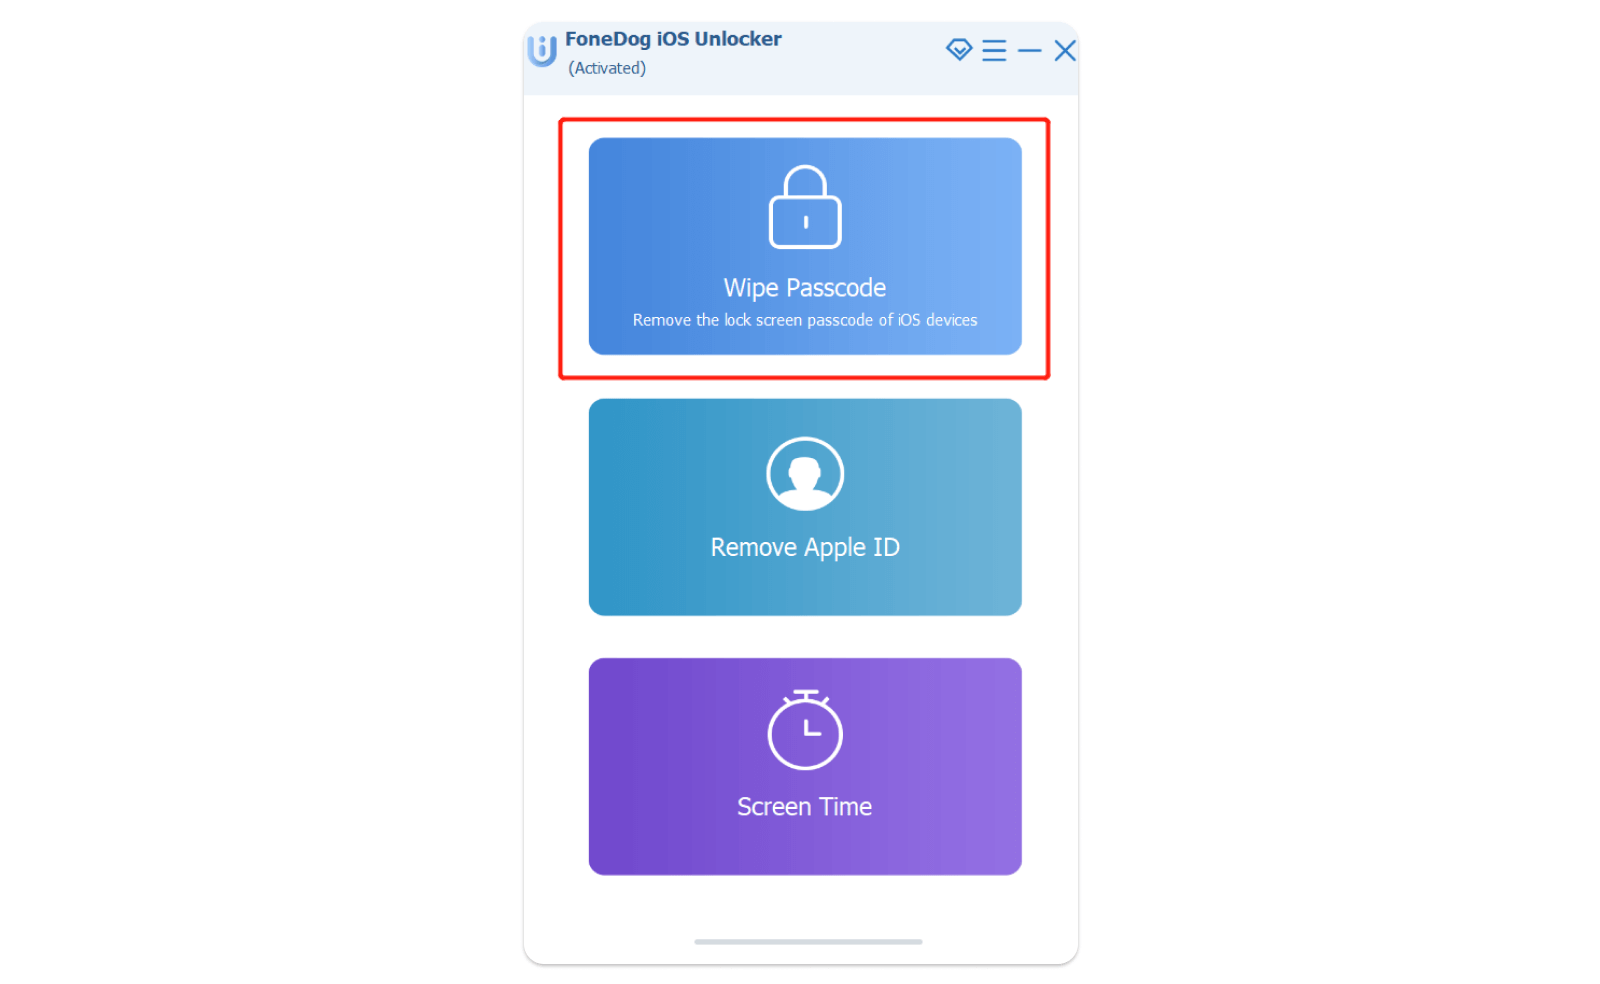
You can easily wipe out the passcode completely to save time and effort in finding the owner or resetting your device. iOS Unlocker is your partner when it comes to several unlocking iOS scenarios.
This professional unlocker has a Wipe Passcode feature that allows you to get rid of the device passcode and use the phone right after.
To unlock your disabled iPhone that won't connect to iTunes, follow the complete steps below to remove the lock:
Step 1. Run iPhone Unlocker
Step 2. Choose the Wipe Passcode menu
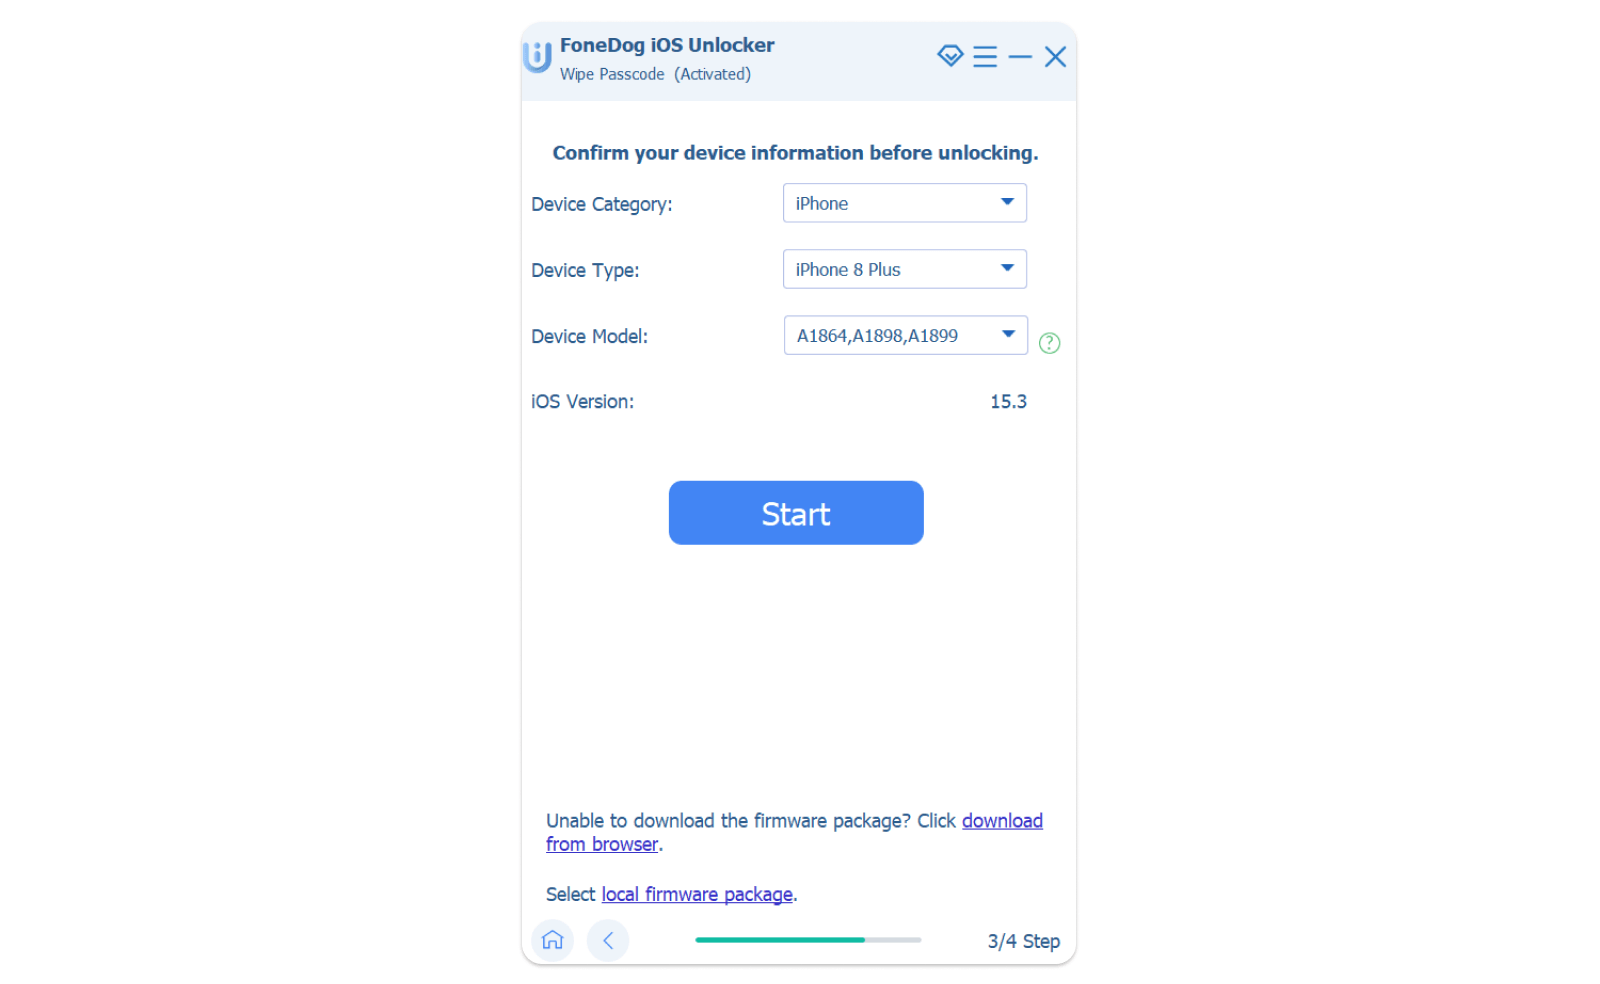
Step 3. Click the Start button
Step 4. Using a USB cable, connect your iPhone
Step 5. Confirm your iPhone and click Start to download the device firmware package
Step 6. Click Unlock
Step 7. Type 0000 in the text field and click the Unlock button
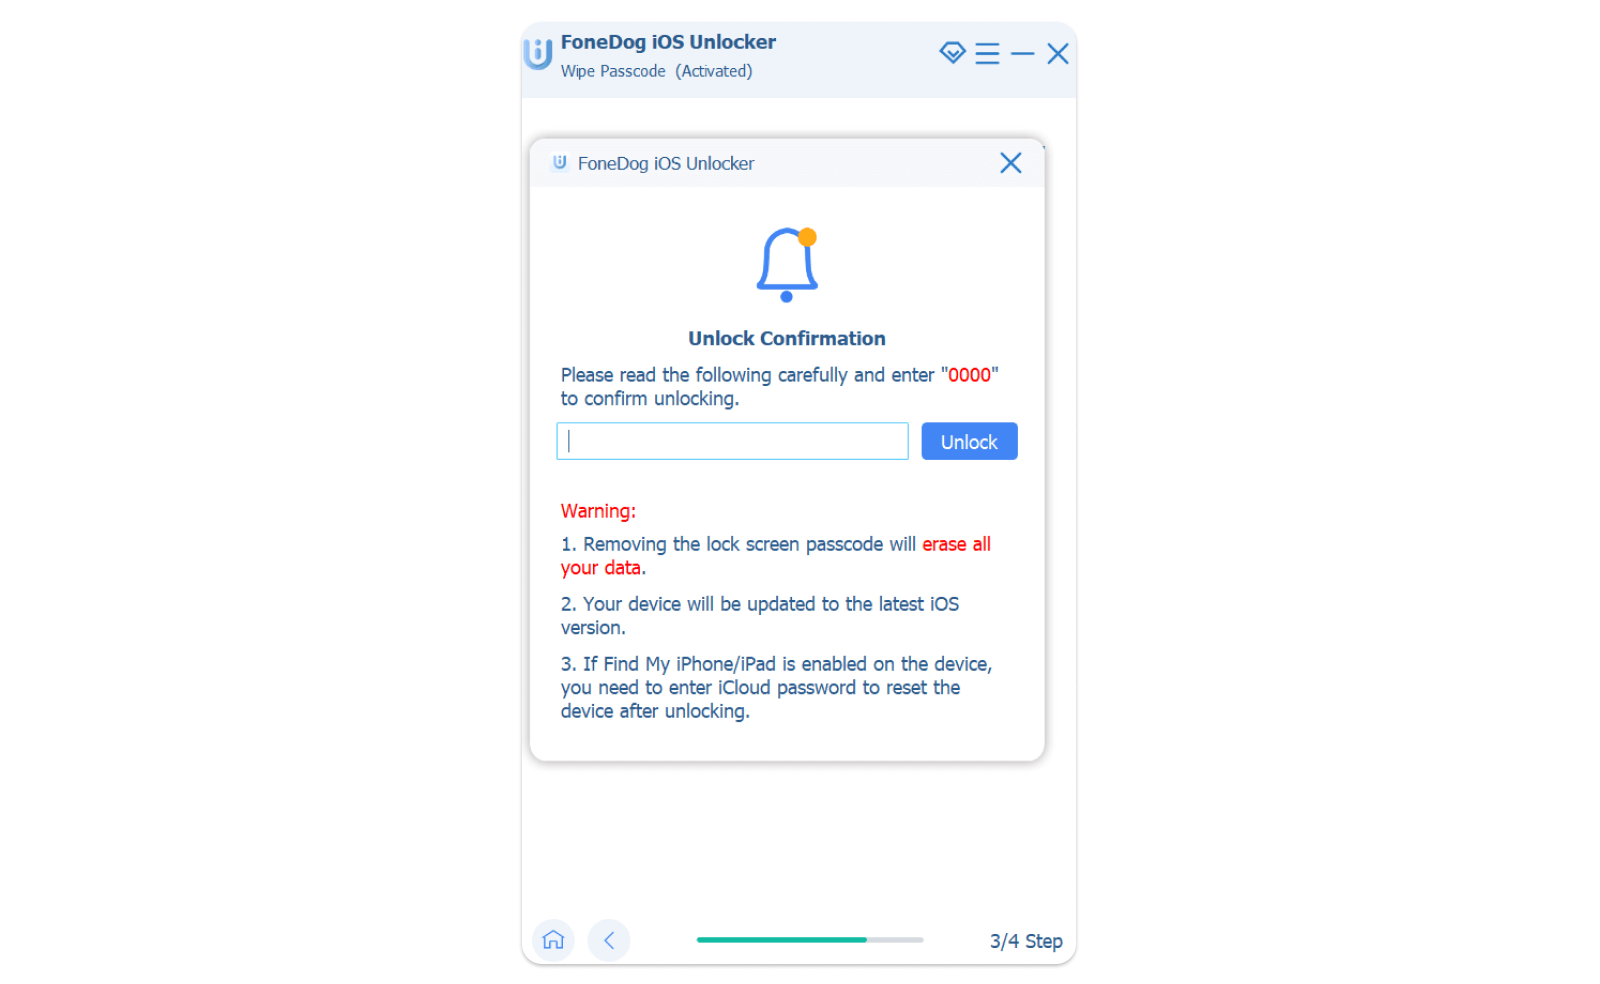
Step 8. Wait for the unlocking to be completed
You have to note though that after you have wiped out the passcode on the iPhone, all data stored in it will be gone. It is always best and highly recommended to take a backup of your device to avoid extreme data loss.
Part 5. Bonus Tips When Creating a Passcode
iOS users should have a passcode activated on their iPhone or iPad for privacy and security. The most secured form of the passcode is a six-digit alphanumeric combination. This is because a six-digit passcode has over a million different combinations, thus, it is stronger than a 4-digit one when it comes to possible hacking and decoding.
Many online blogs and sites cite that the default iPhone passcode is 123456 or 000000. Some even confirmed that it worked on their devices upon trying to unlock. However, Apple does not confirm or has not officially provided a default passcode to any iOS devices.
To select a strong passcode, follow these steps:
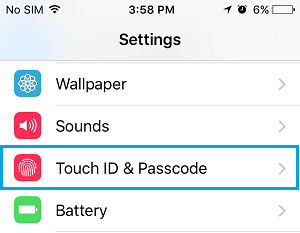
- Open Settings
- Choose Touch ID & Passcode or Passcode (for non-Touch ID)
- Scroll down to Simple Passcode and toggle it off. You will now be asked to create a new passcode
- Enter a 6-digit number and letter combination. You can use letters, numbers, and special characters
- If needed, re-enter new passcode to confirm the request
No one should be able to decode your passcode except yourself so better use a passcode that is easier for you to recall. “iTunes Could Not Connect To This iPhone Because It Is Locked With A Passcode” problem is solved.
People Also ReadHow to Resolve iPad Won’t Connect to Wi-Fi IssueiTunes Could Not Connect to This iPhone. The Error Repair!
Part 6. Summary
This “iTunes could not connect to this iPhone because it is locked with a passcode ” issue is happening to anyone almost every day and many people are still unaware of the possible solutions that they can use to fix this problem. So today’s article guide is dedicated to fixing this annoying problem by getting rid of the passcode and turning it off.
You can remove any old devices synced in iTunes, update or reinstall iTunes, and of course, use proficient software to completely delete the passcode. iOS Unlocker is the most helpful program you can use to eliminate the passcode on your iPhone.
So the next time you forgot your passcode or bought a used iPhone, use iOS Unlocker for any unlocking needs!
Written By Rosie
Last updated: 2022-01-27