


Spotify and Tidal are both excellent when it comes to offering music streaming services to music fanatics. Thus, we can’t blame some Spotify users if they suddenly want to switch over to using Tidal (or even vice versa). In such an instance, it would be so beneficial to know how to move Spotify playlists to Tidal. That’s what this post will offer, so keep on reading.

Listening to music has surely been part of most people’s daily routines. A lot of them are probably even subscribed to premium plans on different music streaming platforms. Among the most popular are Spotify and Tidal.
If you have been using Spotify for quite some time and suddenly felt like you want to switch over to another service provider, considering Tidal would be a good choice. Being a long-time user surely made you create several playlists containing your music favorites. In that case, if you’d like to use Tidal going forward, you must know how to move Spotify playlists to Tidal.
Both Spotify and Tidal are great platforms. However, some users might have found better features on Tidal compared to Spotify, perhaps like music quality or a huge library. Though some would want to immediately make the switch, they are sometimes caught in a situation wherein they have to deal with the hassle of transferring everything they have on Spotify.
Actually, the above shouldn’t bother you. There are definitely effective and efficient ways to move Spotify playlists to Tidal. Several tips and guides will be presented in this article for your easy reference.
Contents Guide Part 1: The Best Option to Move Spotify Playlists to Tidal [No Spotify subscription plan required]Part 2: Other Methods to Move Spotify Playlists to Tidal [Spotify subscription plan required]Part 3: Summary
Part 1: The Best Option to Move Spotify Playlists to Tidal [No Spotify subscription plan required]
We can’t deny the fact that Tidal offers high-quality audio streaming given that it has a Hi-Fi feature. Thus, many are also into using Tidal. Knowing that Spotify contents are protected with DRM may have made you worry about moving Spotify playlists to Tidal with ease. With this encryption, directly downloading and saving Spotify songs can’t actually be done. Well, unless this protection is removed.
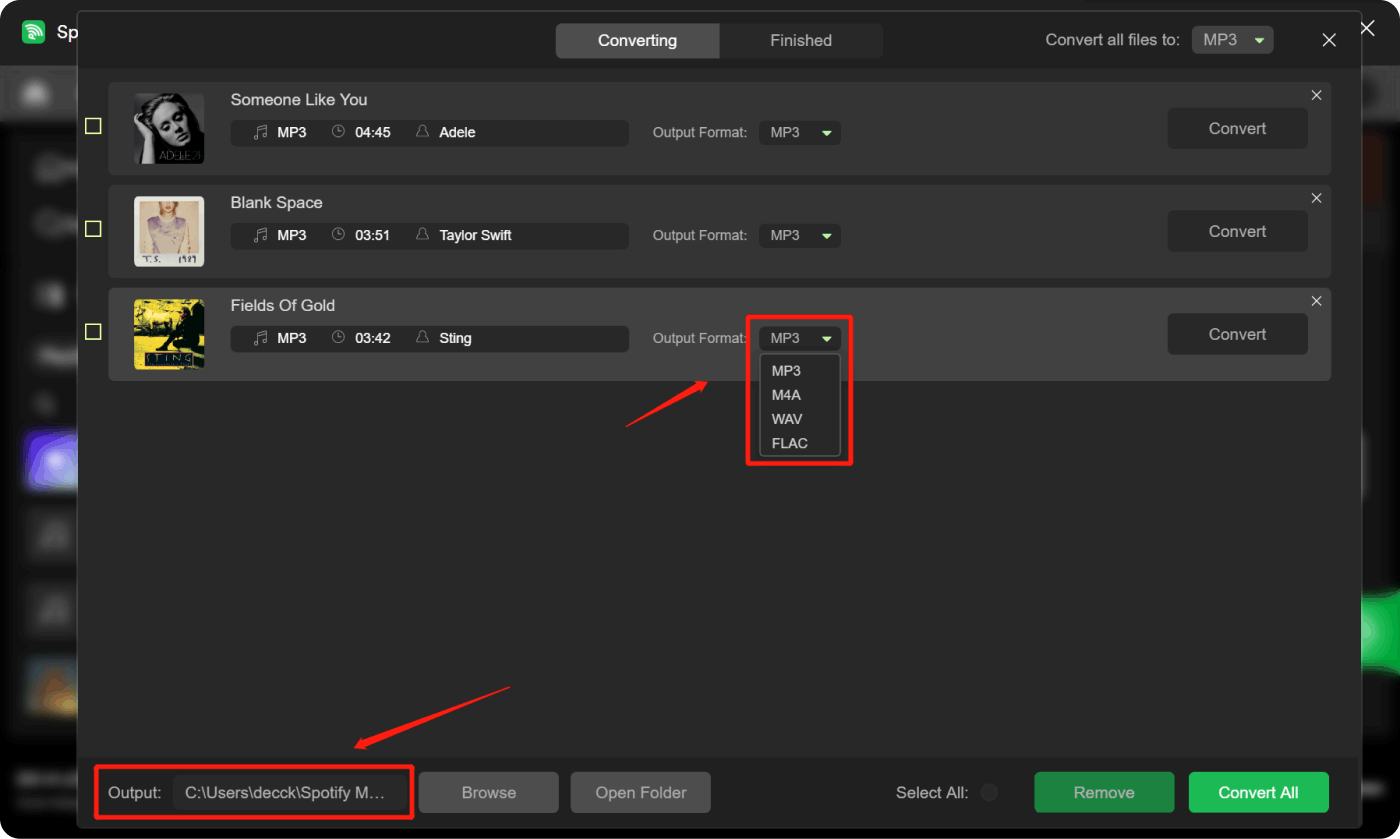
Thankfully, there are tools like the Spotify Music Unlocker that can help with the seamless process of moving Spotify playlists to Tidal. With this tool’s ability to unlock the songs from DRM, downloading and accessing Spotify songs on any device will be made possible. Even so, it can aid in converting the Spotify tracks to MP3 or other flexible and popular formats like FLAC, WAV, and M4A.
Using Spotify Music Unlocker should be easy, as its interface is simple enough even for first-time users. It’s just that, of course, this must first be downloaded and installed on one’s PC. Upon installation, we may now start and fully utilize the app by following the below procedure.
Step #1. Fire up the Spotify Music Unlocker and immediately press the “Open the Spotify web player” button on the main screen. This will lead you to a new window.

Step #2. Press the “Log in” menu at the top-right section of the window and provide your Spotify account information to sign in. If you don’t have an account yet, creating one should be easy by simply signing up.

Step #3. Begin to choose which Spotify content you’d like to process. For albums or playlists, upon selecting, press the green “add” icon to add the songs to the platform. Alternatively, you may also drag and drop them if you’d like to. Adding songs individually is also fine. Duplication shall not happen, as this app can automatically detect double-ups.

Step #4. From the available output formats, choose which one you’d like to use. You may also define an output folder as needed.
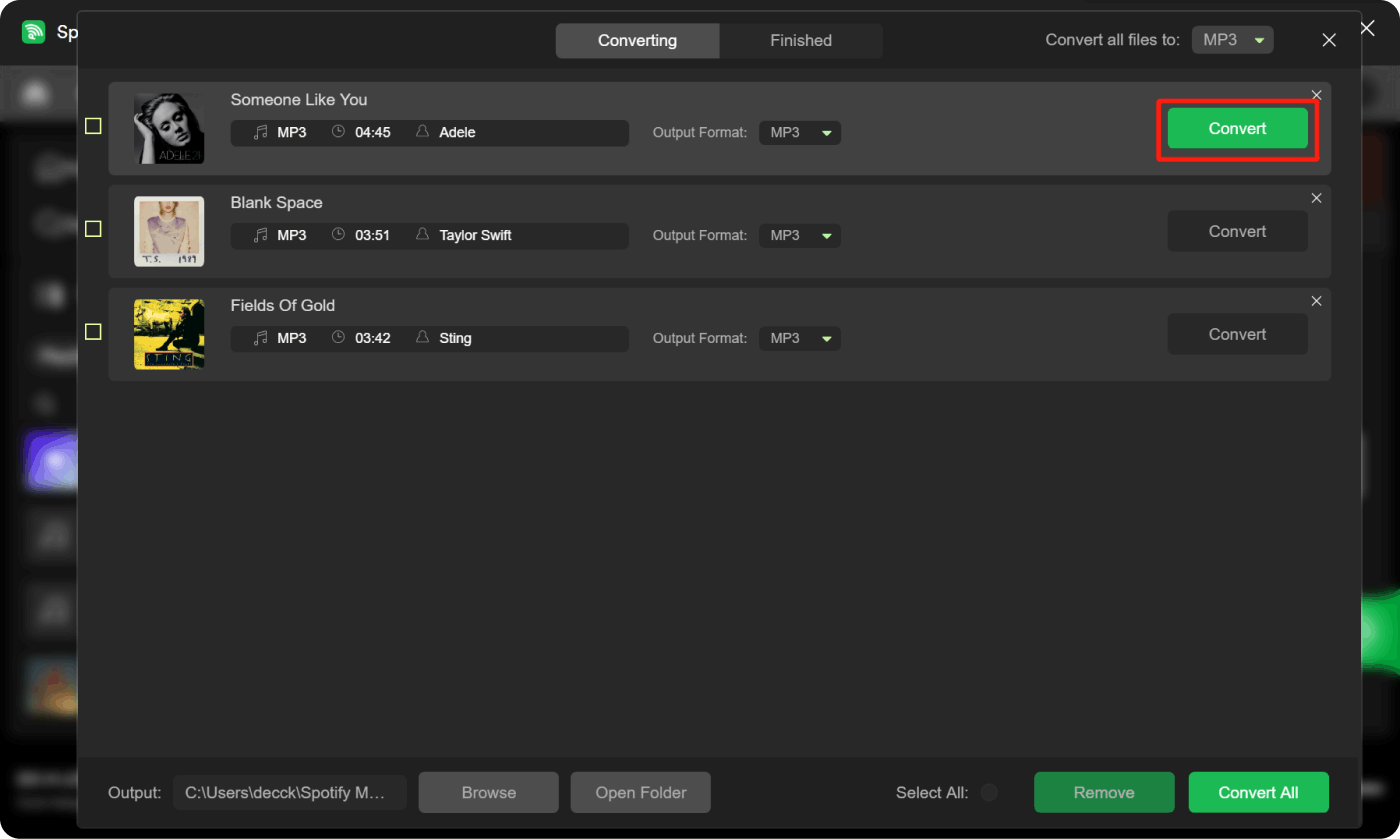
Step #5. The conversion shall begin right after you click either the “Convert” or the “Convert All” button. If you’d like to process all imported songs at once, then you must tap “Convert All”. For selected songs, you should press the “Convert” option.
Once the process has ended, you may easily view the transformed and unlocked Spotify songs that are now ready to be moved to your Tidal library. In order to move Spotify playlists to Tidal, you may upload the tracks to your iTunes library and then utilize Soundiiz to complete the transfer process.
Part 2: Other Methods to Move Spotify Playlists to Tidal [Spotify subscription plan required]
We have also collected here some other methods that could also help you move the playlists from Spotify to Tidal. However, using these tools would require a Spotify subscription plan. If you have an active subscription, resorting to them could be a good option as well. But, of course, we still highly recommend downloading the songs via Spotify Music Unlocker as explained in the first part to also be able to keep the songs as long as you want to.
Method #1. Using Soundiiz
Soundiiz is an online tool that can help you move the playlists from Spotify to Tidal and vice versa with ease. It can support 45 services. You can easily access this via your PC’s web browser or using your Android mobile device.
To use Soundiiz to move Spotify playlists to Tidal, here are the steps that you must take.
Step #1. Go to the official website of Soundiiz. Press the “Start for free” button.
Step #2. Under “Tools”, look for the “Transfer” button and click it.
Step #3. You must put “Spotify” as the source and then specify “Tidal” as the destination.
Step #4. Make sure to sign into your Spotify and Tidal accounts.
Step #5. Press the “Playlists” menu. Afterward, tap the “Confirm my selection” button.
Step #6. Tap the “Save Configuration” button next before pressing the “Confirm” menu.
Once you have seen the “Conversion Success” notification, this means that the transfer has been done successfully.
Method #2. Using TuneMyMusic
Apart from Soundiiz, another online tool that can help move Spotify playlists to Tidal is TuneMyMusic. Aside from supporting Spotify and Tidal, it also supports other platforms, such as YouTube. This can be used on Windows and Mac computers.
Step #1. Head to TuneMyMusic’s official website. Press the “Let’s Start” option.
Step #2. Set up “Spotify” as the source. Press the “Load from Spotify account” option.
Step #3. Choose which Spotify playlists you’d like to move. Tap “Choose Destination” next.
Step #4. Make sure that “Tidal” has been selected as the destination, and then sign into your account.
Step #5. Click the “Start Transfer” option.
Once you see the “Transfer completed” notification, this signifies that the process has been successful.
Method #3. Using FreeYourMusic
A free tool that can be used on mobile devices and PCs when it comes to moving Spotify playlists to Tidal is FreeYourMusic. It is also easy to use. Presented below are the steps that must be accomplished.
Step #1. Go to FreeYourMusic’s website. Press the “Transfer Now” option.
Step #2. You can either choose “Spotify” as the source or the option to connect to Spotify.
Step #3. “Tidal” must be chosen as the destination. Provide your Tidal credentials to log in.
Step #4. Browse and choose the Spotify playlist that you’d like to process. Afterward, choose “Begin Transfer”.
Step #5. You may now start to move Spotify playlists to Tidal.
Method #4. Using MusConv
Unlike the first three methods or tools, MusConv is a music downloader. It can aid in the process of moving Spotify playlists to Tidal and supports various other services apart from these two. It can be installed on PCs and Android devices. Having a user-friendly and clear interface makes this tool loved by many. Listed below is the procedure for using MusConv to finally be able to move Spotify playlists to Tidal.
Step #1. Download MusConv to your PC.
Step #2. Press the “Log in” menu, and then choose “Spotify” as the source platform.
Step #3. Provide your Spotify credentials to log into your account and start choosing the playlists to be moved to Tidal.
Step #4. Press the “Transfer” menu and then choose “Tidal” as the destination platform.
Step #5. Open the Tidal app. Sign into your account.
You should now be able to easily transform Spotify playlists to Tidal via this tool.
Method #5. Using SongShift
If you are an iOS user, you may also take advantage of using SongShift to move Spotify playlists to Tidal. It’s available on the App Store, so installing it won’t be a problem.
Step #1. Upon downloading SongShift, launch it.
Step #2. Press the “Settings” menu. Tap “Connect Music Service” next.
Step #3. Spotify must, of course, be selected as the source. Choose the playlist to be moved by ticking the boxes next to it.
Step #4. Input Tidal as the destination, and then log into your account.
After completing the above, the automatic transfer will then be done by the app.
Part 3: Summary
To move Spotify playlists to Tidal, there are indeed plenty of methods to apply. However, almost all of them would require a Spotify subscription, as directly downloading tracks and moving them won’t be possible knowing that they are protected with DRM. Thankfully, with the help of tools like Spotify Music Unlocker, getting rid of Spotify songs’ DRM protection became so easy. Plus, it can even do file conversion.
People Also Read How to Change Picture on Spotify Playlist: Guide for You How to Easily And Quickly Remove DRM from Spotify Tracks
Written By Rosie
Last updated: 2023-08-10