


There are still times when having a physical copy of your favorite music can be incredibly satisfying. Whether you want to create a personalized mixtape, preserve your favorite tracks for posterity, or simply enjoy your playlist in places with limited internet connectivity, the process to burn YouTube music to CD offers a timeless solution.
While the process might seem a bit technical at first, it's surprisingly straightforward once you know the steps. In this comprehensive guide, we'll walk you through the entire process of converting and burning YouTube music to CD, regardless of your technical expertise. By the end of this guide, you'll be able to curate your own collection of music CDs that you can play in your car, on your home stereo, or share with friends and family.
From choosing the right tools and software to ensuring the best audio quality, we'll cover it all. So, whether you're a music enthusiast eager to create the perfect road trip playlist or someone looking to give a thoughtful and nostalgic gift, read on to discover how to transform your virtual YouTube playlist into a tangible, playable CD.
Contents Guide Part 01. Grab YouTube Music [Tool Recommended]Part 02. Burn YouTube Music to CD [Windows & MAC]Part 03. To Sum It All Up
Part 01. Grab YouTube Music [Tool Recommended]
The first step to burning YouTube music to CD is to have a soft copy of the actual files of the audio you want to make a CD from. To do that, you will need a tool called iOS-Unlocker’s Video Downloader. Are you tired of buffering and unreliable internet connections affecting your music streaming experience?
Look no further than the iOS-Unlocker Video Downloader Tool—a user-friendly, cost-free solution that empowers you to effortlessly save music from YouTube directly onto your device. Whether you're a Windows aficionado or a macOS devotee, this tool caters to all, making your music collection truly portable.
Here's a step-by-step guide to navigating this handy tool:
1. Copy the Video URL: Begin by heading to the YouTube video you’re itching to download. After selecting the video, copy its URL from the browser’s address bar.
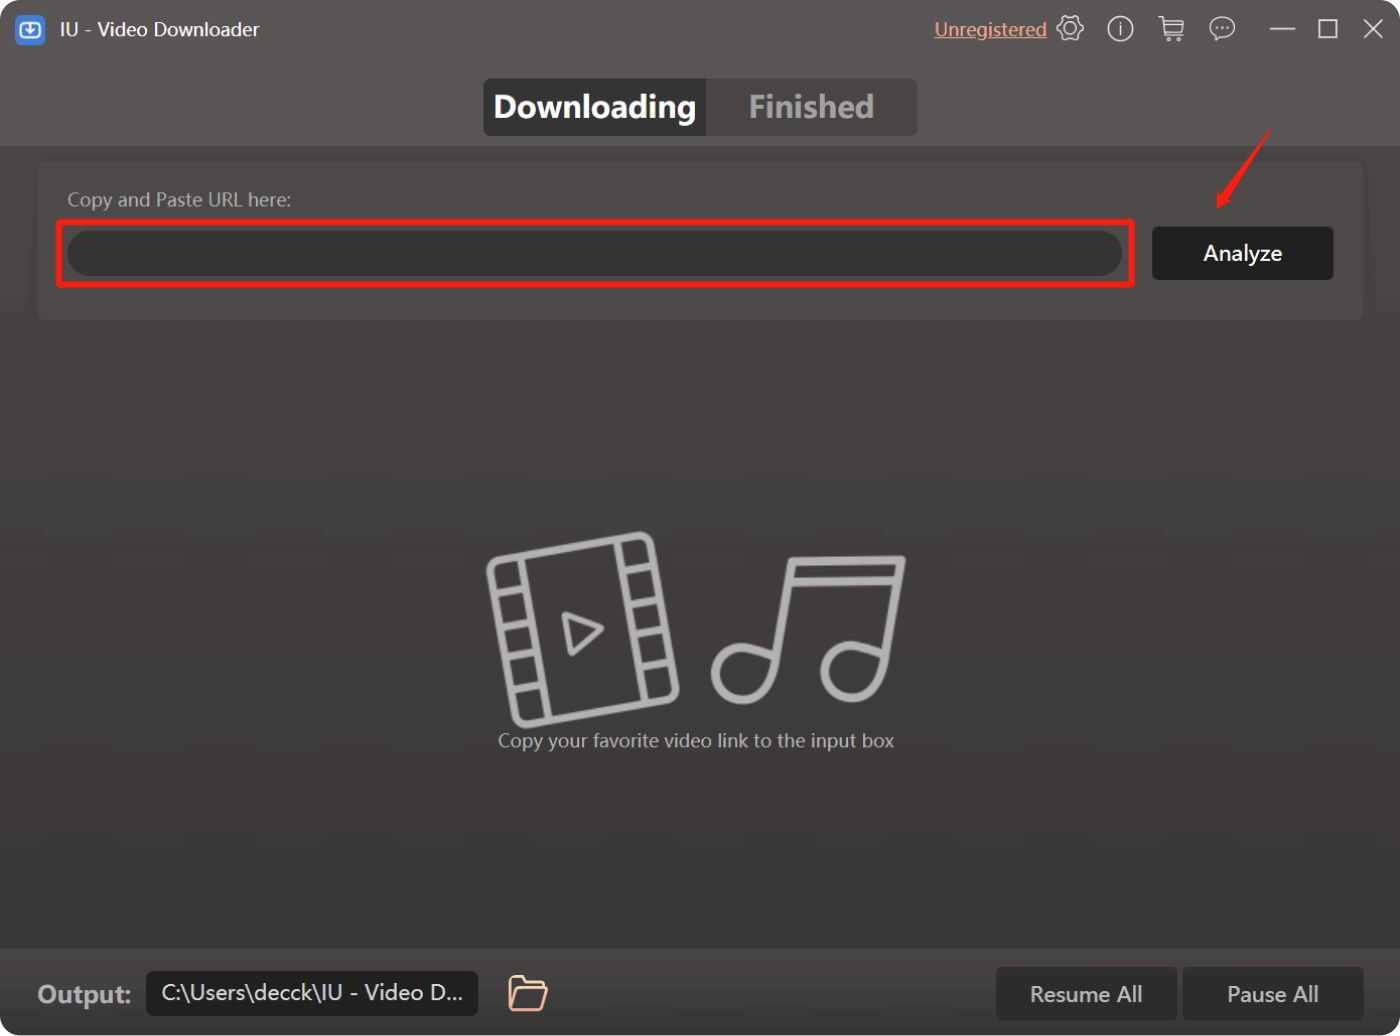
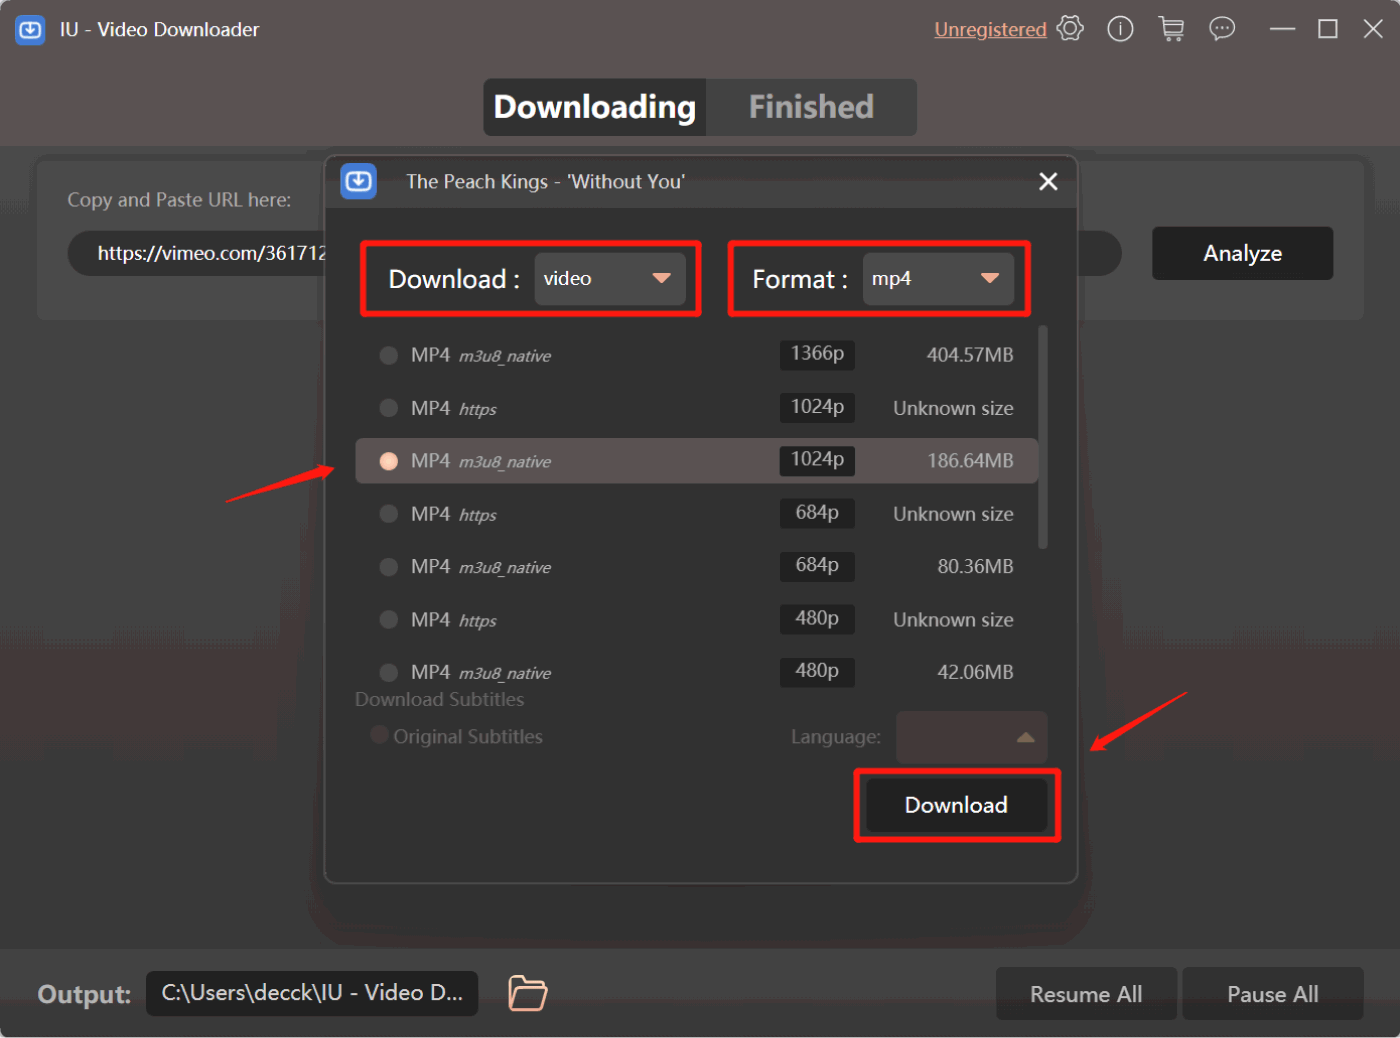
2. Select Your Preferred Format: The iOS-Unlocker Video Downloader offers a range of formats for your downloaded content, be it MP4, MKV, AVI, or even audio-only MP3. Take your pick and customize your download.
3. Initiate the Download: Once you’ve settled on the format, hit the “Download” button to set the process in motion.
4. Patience is Key: Depending on your internet speed and the video’s length, the download process may take a few moments. Exercise a little patience as your chosen content makes its way to your device.
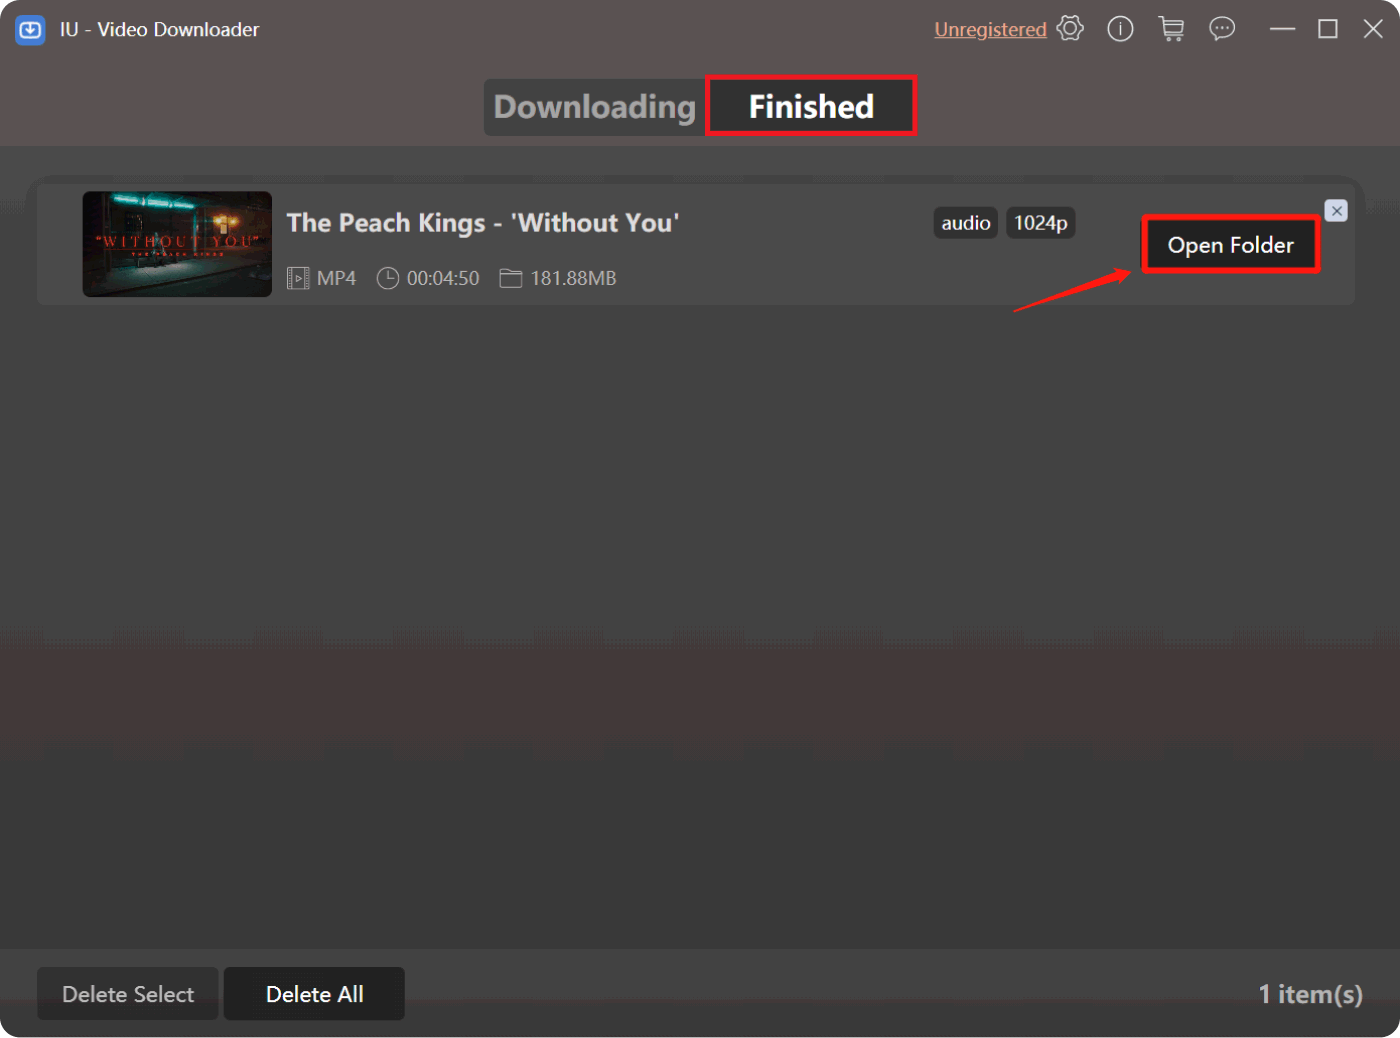
5. Enjoy Your Download: Once the download wraps up, it’s time to revel in your success. Open up your preferred media player and experience your newfound content at your leisure.
But wait, there's more! The iOS-Unlocker Video Downloader extends its prowess beyond YouTube. It's a versatile tool that enables you to procure content from a plethora of beloved websites, such as Instagram, Facebook, Twitter, Vimeo, Niconico, Vevo, Dailymotion, SoundCloud, NASA, and Tumblr.
Dig deeper, and you'll discover that this tool isn't solely about videos; it's also a proficient audio extractor. Yearning to save the audio essence of your favorite tracks? Merely copy the video's URL, paste it into the tool, and watch as it automatically extracts the audio, storing it in pristine MP3 format.
Picture this: curated playlists featuring your most cherished tunes, offline listening unshackled from the web's limitations. But it doesn't end there—the iOS-Unlocker Video Downloader also champions indie artists. Say goodbye to mandatory subscriptions; you can now download their music directly, nurturing the spirit of musical exploration.
In a world where buffering feels like the arch-nemesis of enjoyment, the iOS-Unlocker Video Downloader emerges as a formidable ally. Unchain your music from the clutches of connectivity woes and embrace the freedom of offline listening. It's time to transform the way you experience and treasure your favorite tracks.
Part 02. Burn YouTube Music to CD [Windows & MAC]
Platform 01. On Windows PC [Via Windows Media Player]
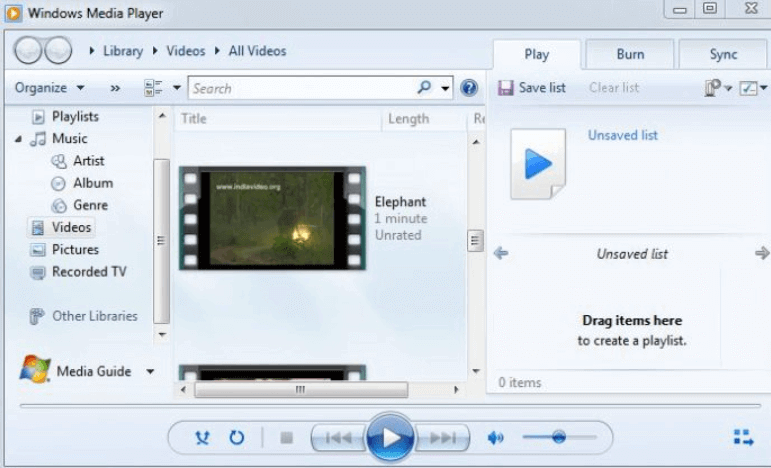
Burning your favorite YouTube music tracks onto a CD can be a fantastic way to create a tangible collection of your cherished tunes. If you're using a Windows PC, Windows Media Player offers a straightforward method to accomplish this. Follow these simple instructions to master the art of transforming virtual melodies into physical reality.
- Launch Windows Media Player: Start by opening Windows Media Player on your Windows PC. You can find it in the “Start” menu or by searching for it in the search bar.
- Insert a Blank CD: Make sure you have a blank CD-R or CD-RW disc ready. Insert it into your computer’s CD/DVD drive.
- Select Burn Tab: Click on the “Burn” tab at the top of the Windows Media Player window. This will switch your view to the burning interface.
- Drag and Drop Music: Open a File Explorer window and locate the YouTube music files you want to burn. Simply drag and drop these files from the File Explorer into the Windows Media Player’s burn list.
- Arrange the Playlist (optional): Arrange the tracks in the order you want them to appear on the CD by dragging them up or down within the burn list.
- Start Burning: Once your playlist is set, click the “Start burn” button. Windows Media Player will begin converting your selected tracks and writing them onto the CD.
- Wait for Completion: Depending on the number of tracks and your computer’s processing speed, the burning process may take some time. You’ll see a progress bar indicating the status.
- Finalize the CD (optional): If you’re using a CD-RW disc and you want to add more tracks later, you can choose not to finalize the disc. However, if you’re using a CD-R disc, it will be finalized automatically.
- Eject and Enjoy: Once the burning process is complete, the CD will be ejected. Take it out and pop it into a compatible CD player to enjoy your handpicked playlist.
Burning YouTube music to a CD using Windows Media Player on your Windows PC is a simple and rewarding process. Whether you're creating a mix for a road trip or compiling your favorite tracks for a thoughtful gift, this method provides a tangible connection to your digital world of music.
Platform 02. Burn YouTube Music to CD on macOS Computers [Via Music App]
![]()
If you're an Apple enthusiast using a macOS computer, the Music app provides a seamless way to transform your beloved YouTube music into a tangible collection. Let's delve into the process of burning your cherished tracks onto a CD using the Music app.
- Open the Music App: Begin by launching the Music app on your macOS computer. You can find it in the Applications folder or by using Spotlight search.
- Insert a Blank CD: Ensure you have a blank CD-R or CD-RW disc ready. Insert it into your computer’s CD/DVD drive.
- Create a Playlist: In the Music app, create a new playlist by selecting “File” from the top menu, then “New” and “Playlist.” Give your playlist a name that resonates with your selected tracks.
- Add YouTube Music: Locate the YouTube music tracks you want to burn in your Music library. Drag and drop these tracks into the newly created playlist.
- Arrange Playlist Order (optional): Rearrange the tracks within the playlist to define the order in which they will appear on the CD. Simply drag and drop the tracks to your preferred sequence.
- Insert CD Name and Settings: Click on the playlist you’ve created, then click on “File” in the menu bar and select “Burn Playlist to Disc.” A dialog box will appear where you can enter the CD name and choose burning settings.
- Choose Burning Settings: Under “Burn Settings,” you can select your preferred speed and audio format. For the best compatibility, it’s recommended to use the default settings.
- Start Burning: Once you’ve configured the settings, click the “Burn” button. The Music app will initiate the burning process and begin converting your playlist to CD format.
- Wait for Completion: Depending on the number of tracks and your computer’s performance, the burning process may take some time. A progress bar will keep you updated on the status.
- Eject and Enjoy: Once the burning process is finished, the CD will be ejected automatically. Retrieve your newly minted CD, pop it into your CD player, and relish your carefully curated playlist.
By utilizing the Music app on your macOS computer, you can effortlessly translate your virtual YouTube music selection into a tangible auditory experience. This method encapsulates the synergy of digital convenience and classic charm, giving you the best of both worlds.
Part 03. To Sum It All Up
In a world where digital convenience often reigns supreme, the act of burning YouTube music to a CD introduces a touch of nostalgia and a tangible connection to your favorite tunes. Whether you're using a Windows PC with Windows Media Player or a macOS computer with the Music app, the process is straightforward and rewarding. You can even use iOS-Unlocker’s Video Unlocker tool to grab all the tracks you want to put on your CD.
As you embark on this journey, remember that the process isn't just about creating a CD; it's about crafting a personalized musical experience that transcends the digital realm. Whether it's for your own enjoyment or to share your musical tastes with others, burning YouTube music to a CD is a testament to the enduring power of music to connect us across time and technology.
People Also Read How to Download YouTube Music without Premium: Top Methods Unlocking Flexibility: Convert Amazon Prime Music to MP3
Written By Rosie
Last updated: 2023-08-10