


Do you already know how to export iTunes Playlist to an external hard drive, but find it tedious to import your iTunes Library from an external hard drive? Or perhaps you've recently switched to iTunes and wish to consolidate all your tunes in one place for a more streamlined music experience. Fortunately, the process on how to transfer music from external hard drive to iTunes is surprisingly straightforward.
In this article, we will walk you through a detailed step-by-step guide on how to transfer music from your external hard drive to iTunes. Whether you're using a Windows PC or a Mac, the procedure is similar and will enable you to enjoy your favorite songs with ease.
Say goodbye to fumbling through different media players and hello to a well-organized iTunes library that lets you savor your music collection hassle-free. So let's dive in and make your music management simpler and more enjoyable!
Contents Guide Part #1: How to Transfer Music from External Hard Drive to iTunes: Mac And WindowsPart #2: Bonus Tip: The Best Way to Grab Tracks from Apple Music – Apple Music UnlockerConclusion
Part #1: How to Transfer Music from External Hard Drive to iTunes: Mac And Windows
Method #1: Using Your macOS Computer
Transferring music from your external hard drive to iTunes on a macOS computer is a straightforward process. Follow these simple steps on how to transfer music from external hard drive to iTunes using your Mac computer:
Step #1: Plug in Your External Hard Drive
Begin by connecting your external hard drive to your Mac using the appropriate cable or interface. Ensure the drive is recognized by your computer and appears on the desktop or in the Finder sidebar.
Step #2: Open iTunes
If you already have iTunes installed on your Mac, open the application. If you don't have iTunes, you can download and install it from the official Apple website.
Step #3: Go to Preferences
In iTunes, click on the "iTunes" menu in the top-left corner of your screen and select "Preferences" from the drop-down menu.
Step #4: Locate iTunes Media Folder Location
In the Preferences window, click on the "Advanced" tab. Here, you'll see the location of your iTunes Media folder. Make a note of this location as you'll need it later.
Step #5: Locate Music on External Hard Drive
Now, open a new Finder window, navigate to your external hard drive, and find the folder containing your music files.
Step #6: Drag And Drop Music Files
Select the music files you want to transfer to iTunes and drag them from your external hard drive folder to the iTunes Media folder (the one you noted in Step 4). Alternatively, you can drag and drop the music files directly into the iTunes window.
Step #7: Import Music to iTunes
After the copying process is complete, go back to iTunes. Click on the "File" menu and select "Add to Library". Navigate to the iTunes Media folder, select the transferred music files, and click "Open" to import them into iTunes.

Step #8: Sync Your Music (Optional)
If you have automatic syncing enabled for your iOS device (iPhone, iPad, iPod), connect it to your Mac, and iTunes will sync the newly added music to your device.
Congratulations! You've successfully transferred your music from the external hard drive to iTunes on your macOS computer. Now you can enjoy your music collection directly from iTunes, making it easier to manage and organize your favorite tunes. In the next section, we'll explore how to transfer music to iTunes on a Windows PC.
Method #2: Using Your Windows PC
Transferring music from an external hard drive to iTunes on a Windows PC is a relatively simple process. Follow these step-by-step instructions on how to transfer music from external hard drive to iTunes using Windows:
Step #1: Plug in Your External Hard Drive
Begin by connecting your external hard drive to your Windows computer using the appropriate cable or interface. Ensure that the drive is recognized and appears in the File Explorer.
Step #2: Install iTunes (If Not Already Installed)
If you don't have iTunes installed on your Windows PC, visit the official Apple website and download the latest version of iTunes. Install the software following the on-screen instructions.
Step #3: Open iTunes
Once iTunes is installed, launch the application on your Windows computer.
Step #4: Go to Preferences
In iTunes, click on the "Edit" menu at the top-left corner of the window (if you're using an older version of iTunes, it might be the "File" menu). From the drop-down menu, select "Preferences".
Step #5: Locate iTunes Media Folder Location
In the Preferences window, click on the "Advanced" tab. Here, you'll find the location of your iTunes Media folder. Take note of this location as you'll need it later.
Step #6: Find Music on Your External Hard Drive
Open the File Explorer (previously known as Windows Explorer) and navigate to your external hard drive. Locate the folder that contains your music files.
Step #7: Drag And Drop Music Files
Select the music files you wish to transfer to iTunes and drag them from your external hard drive folder to the iTunes Media folder (the one you noted in Step 5). Alternatively, you can drag and drop the music files directly into the iTunes window.
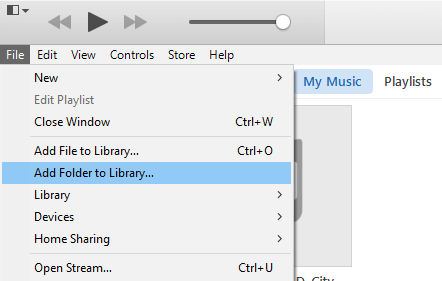
Step #8: Import Music to iTunes
After the copying process is complete, go back to iTunes. Click on the "File" menu, then select "Add Folder to Library". Navigate to the iTunes Media folder, select the transferred music files, and click "OK" to import them into iTunes.
Step #9: Sync Your Music (Optional)
If you have automatic syncing enabled for your iOS device (iPhone, iPad, iPod), connect it to your Windows PC, and iTunes will sync the newly added music to your device.
Congratulations! You've successfully transferred your music from the external hard drive to iTunes on your Windows computer. Now you can enjoy a well-organized iTunes library, making it easier to access and enjoy your favorite music tracks. Whether you're using a Mac or a Windows PC, the process is simple, allowing you to enjoy your music hassle-free.
Part #2: Bonus Tip: The Best Way to Grab Tracks from Apple Music – Apple Music Unlocker
Now you know how to transfer music from external hard drive to iTunes, we bring you to another chapter. A piece of software called Apple Music Unlocker can get rid of the DRM restrictions on Apple Music tracks. This implies that regardless of whether you have an active Apple Music subscription or not, you are free to listen to your Apple Music music on any device.
Your Apple Music music is converted with Apple Music Unlocker to a DRM-free format, like MP3 or AAC. Since this technique is lossless, there will be no audio quality loss. Once converted, your songs are available for transfer to any device and unrestricted listening.
With the help of the Apple Music Unlocker, you may have more control over your Apple Music music. Apple Music Unlocker is a fantastic choice if you want to be able to listen to your Apple Music tracks on iPod, or any device such as iPod Touch, iPhone, MP3 player, etc.
Here are the steps to use it:
1. Install iTunes on your computer and log in to your account.
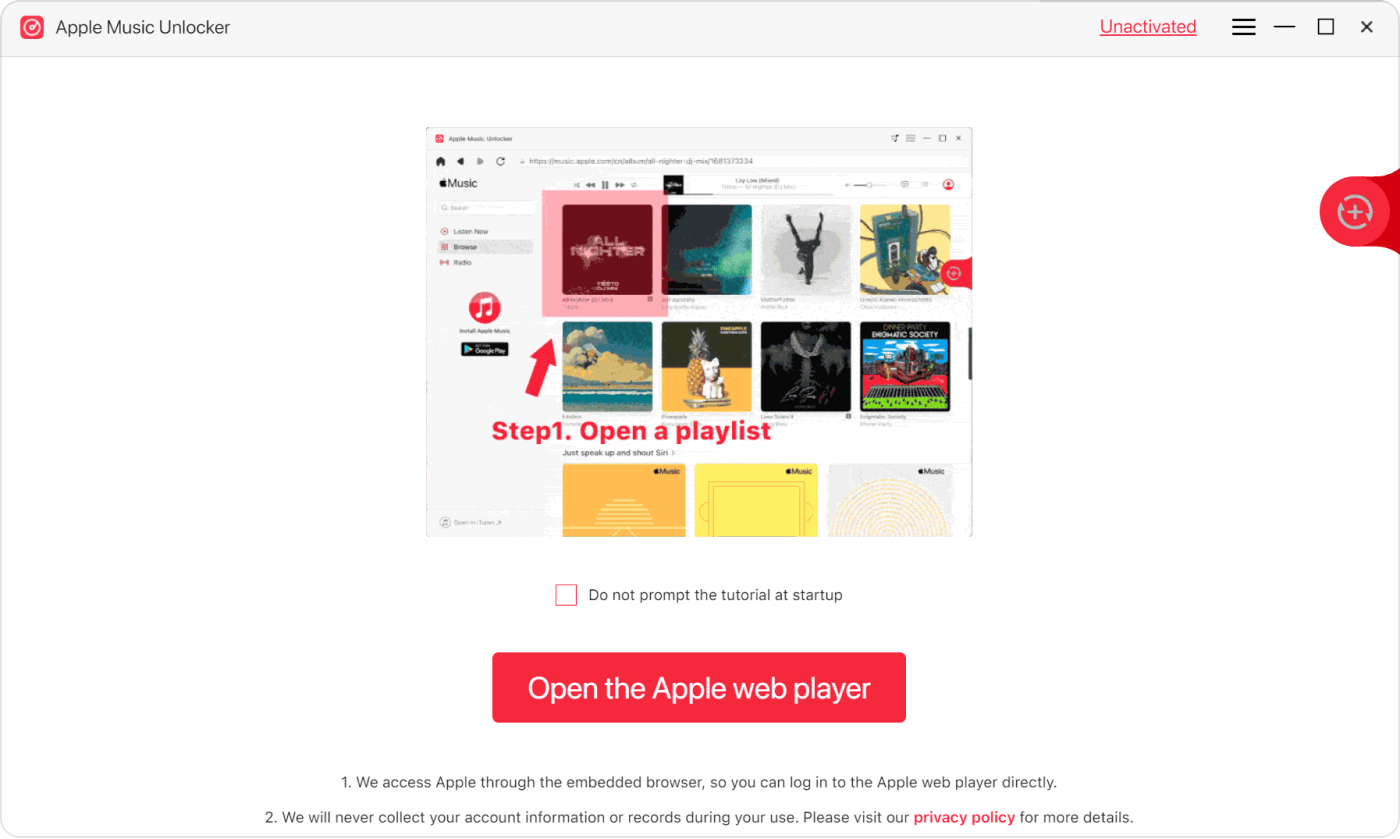
2. Launch the Apple Music Unlocker application.
3. Access the Apple web player by clicking on "Open the Apple web player" in the menu.
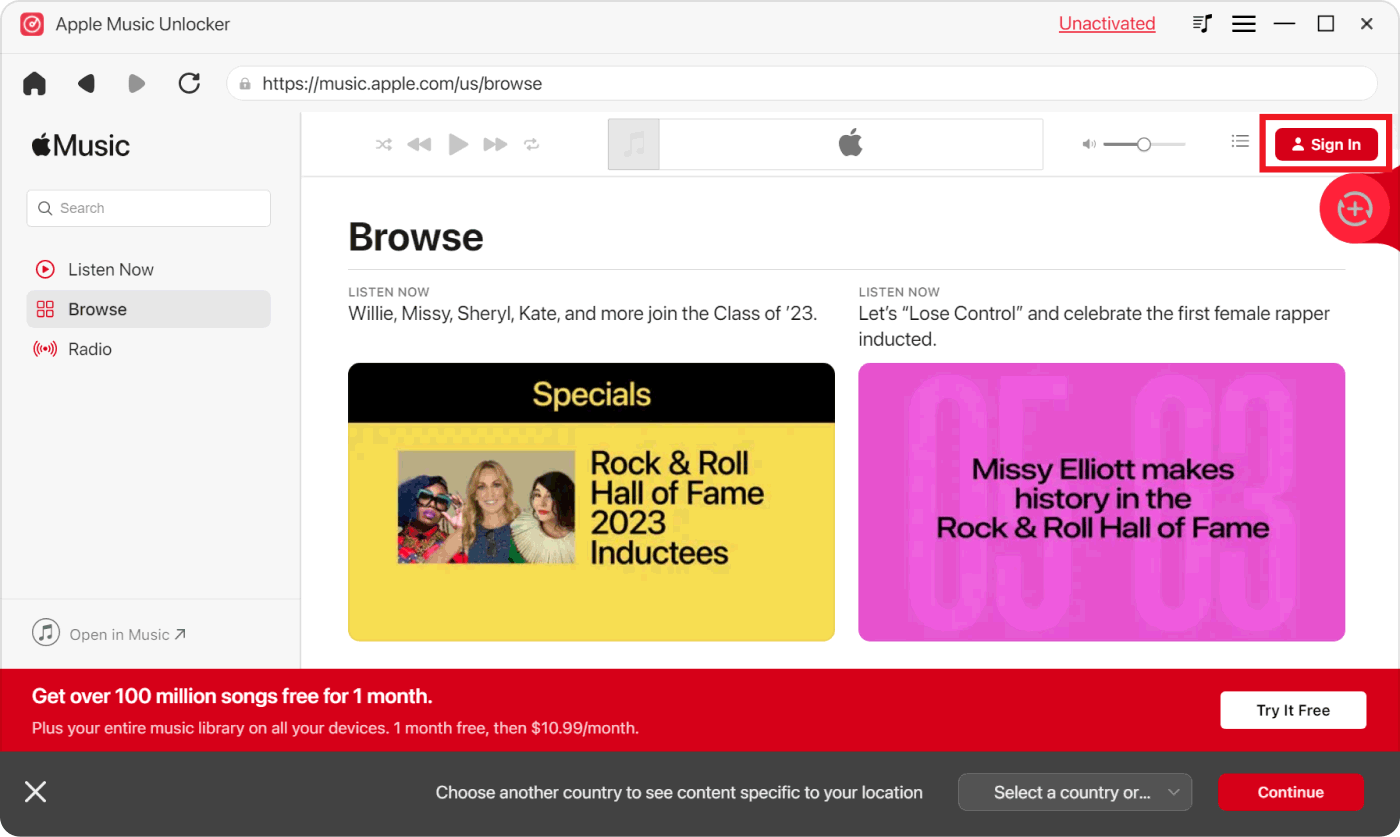
4. Sign in to your Apple ID located in the top right corner of the window.
5. To import a specific song or playlist, simply drag and drop the title onto the red add icon.

6. To import all songs from a playlist, open the playlist and click on the red add icon.
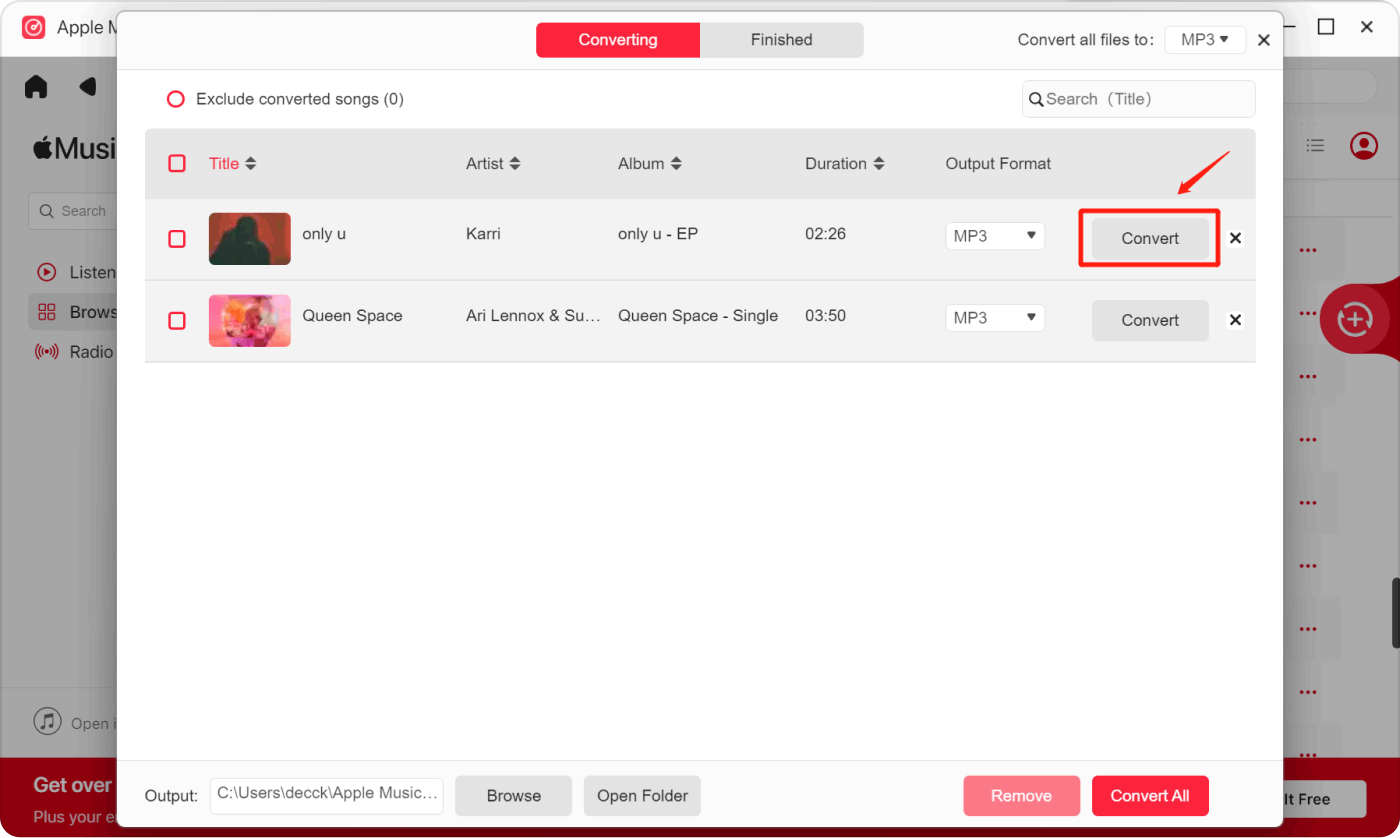
7. Choose the desired output format for your converted files. Available formats include MP3, M4A, WAV, and FLAC.
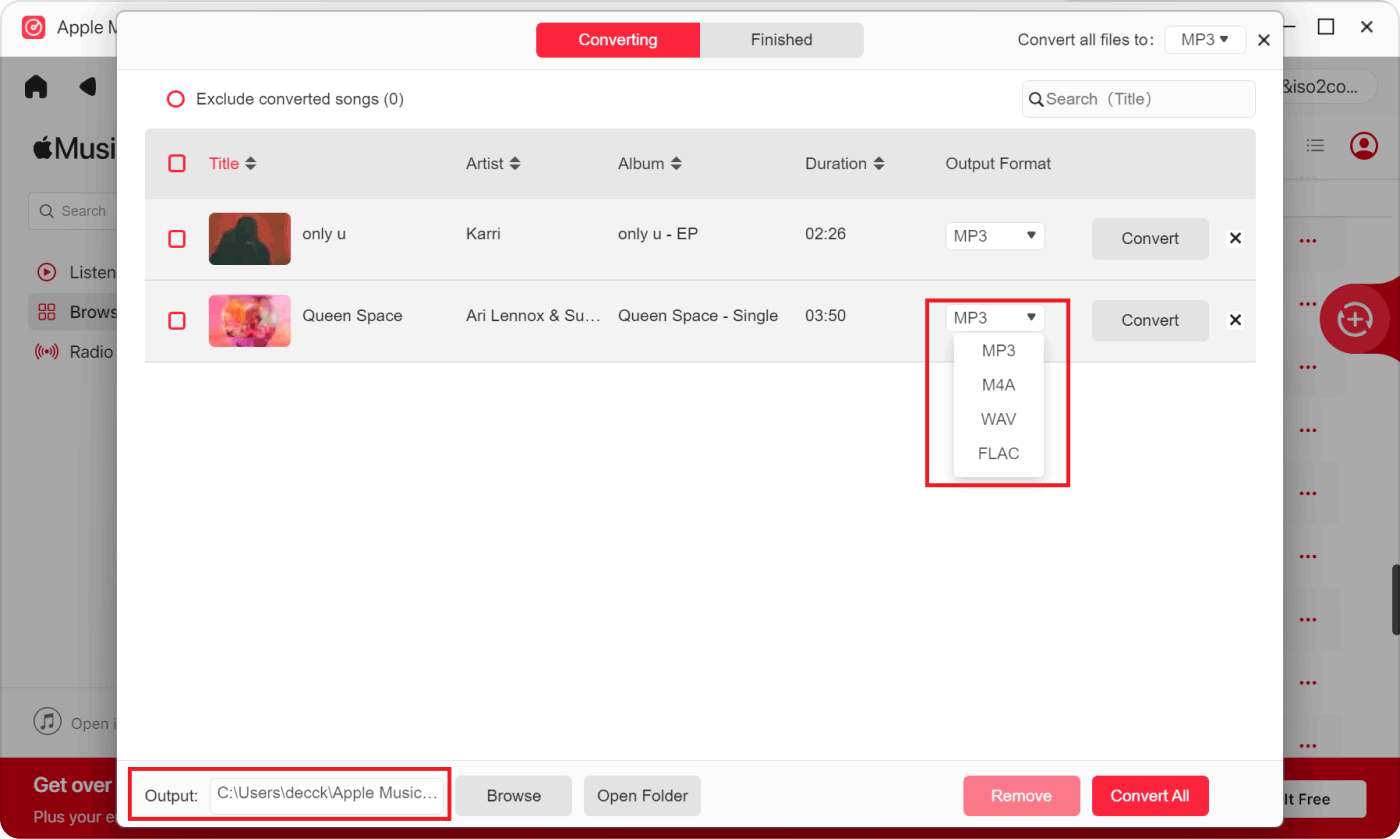
8. Click the "Change" button to select a different folder as the output destination.
9. Initiate the conversion process by clicking the "Convert" button.
Once you have the tracks with you, it is possible to transfer them to iTunes using the steps we have outlined in Part 1 of this article.
People Also Read GUIDE: Top Tricks to Transfer iTunes Audiobooks to iPhone How to Transfer Music from Spotify to iTunes on Windows
Conclusion
The process on how to transfer music from external hard drive to iTunes can make your music management more efficient and enjoyable. Whether you're using a macOS computer or a Windows PC, the process is relatively straightforward, and the result is a well-organized iTunes library that allows you to easily access and enjoy your favorite tunes.
On a macOS computer, connecting your external hard drive and dragging the music files to the iTunes Media folder simplifies the process. For Windows users, installing iTunes, locating the iTunes Media folder, and importing music from the external hard drive through drag-and-drop offers a seamless experience.
While iTunes provides an excellent platform for music organization and playback, there are also third-party tools that enhance the iTunes experience even further. Among these, Apple Music Unlocker stands out as a reliable and user-friendly option. The application allows you to effortlessly transfer your favorite songs and playlists to iTunes by simply dragging and dropping them, and converting them into various formats like MP3, M4A, WAV, and FLAC as per your preference.
Additionally, Apple Music Unlocker lets you unlock the full potential of your Apple Music subscription, ensuring that you have the freedom to listen to your music anytime and anywhere, even offline. With its easy-to-use interface and a wide array of output formats, Apple Music Unlocker proves to be the best tool to enhance your iTunes experience and take your music listening to new heights.
Written By Rosie
Last updated: 2023-07-19