


Have you decided to switch over to using Spotify from iTunes but suddenly, you realized that you’ve got contents on iTunes that you’d like to move? Well, then, following the guide on how to transfer iTunes playlists to Spotify is what you need to do! We’ve got all the details that you need in this post!
Using platforms like Spotify, Amazon Music, Apple Music, iTunes, and more is definitely a good move when trying to stream good music. Each has unique benefits for its users. However, we can’t blame people for switching from one to another. If you are one of those users who previously use iTunes but would like to start utilizing Spotify more, then it would surely be beneficial to find out how you can transfer iTunes playlists to Spotify.
If you haven’t found the best and most reliable guide yet when it comes to the process of how to transfer iTunes playlists to Spotify, then you’ve come to the right page. We will be sharing here some methods for how this can be accomplished seamlessly and easily. There are actually bunches of ways that you can check out and apply. Some of those will be presented here in detail.
Let’s begin the discussion then!
Contents Guide Part 1: How to Transfer Purchased iTunes Playlists to SpotifyPart 2: How to Transfer iTunes Playlists to Spotify via Online MethodsPart 3: Additional Tip: How to Unlock and Convert Spotify SongsPart 4: Summary
Part 1: How to Transfer Purchased iTunes Playlists to Spotify
If you have some purchased songs in your iTunes library, you should know that they are in AAC format and are not protected. Thus, exporting the palylist directly via iTunes is totally possible. Afterward, you will be able to transfer iTunes playlists to Spotify seamlessly.
Again, you have to take note that this process will only work for iTunes music files that are unprotected.
Here are the things that you have to do:
Step #1. Share the iTunes Library File
- Launch your iTunes app, and then tap the “File” menu. Choose “Edit” and then “Preferences” next. This will let you open the iTunes Preferences window.
- On the window that would pop up, head to the “Advanced” tab.
- Look for the “Share iTunes library XML with other applications” option and then put a checkmark on the box beside it.
- To confirm and close the window, tap the “OK” button.
Step #2. Transform the iTunes Playlist to MP3 Format
If you are thinking of applying this to Apple Music and iTunes music M4P songs, this won’t work as only the ACC unprotected tracks can be processed.
- On iTunes, head to the “Preferences” option. Tap it to launch the “Settings” view. Press the “General” tab, choose “Import Settings”, then the “MP3 Encoder” menu.
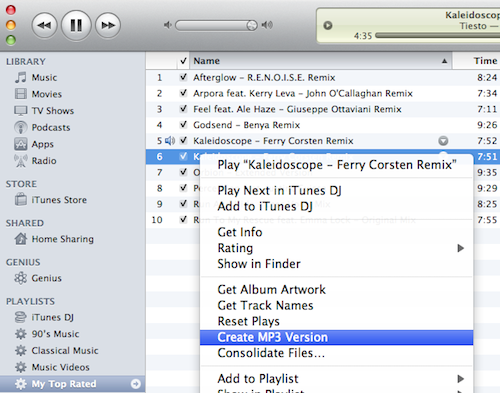
- Browse your iTunes playlists and choose all the contents that you’d like to transfer to Spotify. Afterward, click the “File” option, choose “Create New Version”, and then click the “Create MP3 Version” option. The selected songs from iTunes will be converted to MP3 format.
Step #3. Transfer the MP3 Versions of the iTunes Songs to Spotify
Finally, you will now be able to complete the process of transferring iTunes playlists to Spotify.
- Launch your Spotify desktop app next. Tap the “downward arrow” icon that you’ll see at the top. Choose the “Settings” menu and just scroll until you see the “Local Files” tab.
- By default, both the “iTunes” and “Music Library” options shall be seen. To import the iTunes songs, switch the sliders from “Off” to “On” mode.
- Head back to iTunes’ main screen. The “Show Local Files” options must be turned on. Afterward, all the songs that you have added from iTunes shall be shown.
On your mobile devices, you can also access these local files and listen to them as you like.
Just in case you can’t see the “iTunes” menu under “Local Files”, you just press the “Add a Source” button to have iTunes added and finally perform the transfer of iTunes playlists to Spotify.
Part 2: How to Transfer iTunes Playlists to Spotify via Online Methods
Apart from sharing with you how to transfer iTunes playlists to Spotify (for the purchased tracks), we will now be presenting how it can be done using two online methods. Just keep in mind that using these two won’t work if you are looking at processing exclusive iTunes playlists.
1. Soundiiz
One of the most popular online playlist managers and converters is Soundiiz. It can aid in the syncing process of contents between music streaming websites. Using this tool, you can recreate the iTunes playlists that you like on Spotify. Again, if the tracks are exclusive only to iTunes, then using Soundiiz won’t work. If you are fine with this, then follow the below steps to use Soundiiz.
Use an Exported Playlist as an iTunes File
- Launch your iTunes app.
- Head over to the playlist that you wish to export. Tap the “File” menu, then “Library”, and finally, the “Export Playlist” option.
- Select the “.txt” format.
- Get the playlist file saved on your device.
- Head back to Soundiiz and then choose “iTunes”. Just upload the exported file and then confirm.
- Follow the onscreen instructions to upload the playlist to Spotify.
Use the URL of the Playlist from iTunes
- Launch the iTunes app.
- Locate the playlist you’d like to export. Tap the “three-dot” icon that you’ll see, and then choose the “Share Playlist” menu. Afterward, tap the “Copy Link” option.
- Go to Soundiiz. From the platform list, choose “iTunes”.
- Paste the copied link and then confirm.
- Follow the onscreen instructions to upload the playlist to Spotify.
2. TuneMyMusic
If you are not too keen to create an account, then you may use TuneMyMusic instead to transfer iTunes playlists to Spotify. It is another online option that works almost the same as Soundiiz. Let’s find out how you can use this one.
- On your PC, just head to TuneMyMusic’s official website. Tap the “Let’s Start” menu.
- The source music platform must be set to “iTunes”.
- Go to your iTunes library and start to choose the playlist that you’d like to transfer to Spotify. Get the link tothe selected playlist.
- Head back to TuneMyMusic, enter the link, and then tap the “Load playlist” option next.
- “Spotify” must be selected as the destination.
Finally, the chosen iTunes playlist will be added to your Spotify library!
Part 3: Additional Tip: How to Unlock and Convert Spotify Songs
Upon sharing with you how you can transfer iTunes playlists to Spotify, we thought it would also be good to share an extra tip on how you can unlock and transform your Spotify favorites. Given that they are encrypted with protection, you are probably thinking that making them accessible anywhere is impossible. Well, it’s absolutely not! With the help of the Spotify Music Unlocker, you can even have your Spotify favorites converted to common formats like MP3, WAV, M4A, and FLAC!
To begin using the Spotify Music Unlocker, you have to download and install it first. This is supported by both Mac and Windows, so using any of these two should be good. Once installed, just open the app.
In order to use the Spotify Music Unlocker, the below detailed guide should be followed.
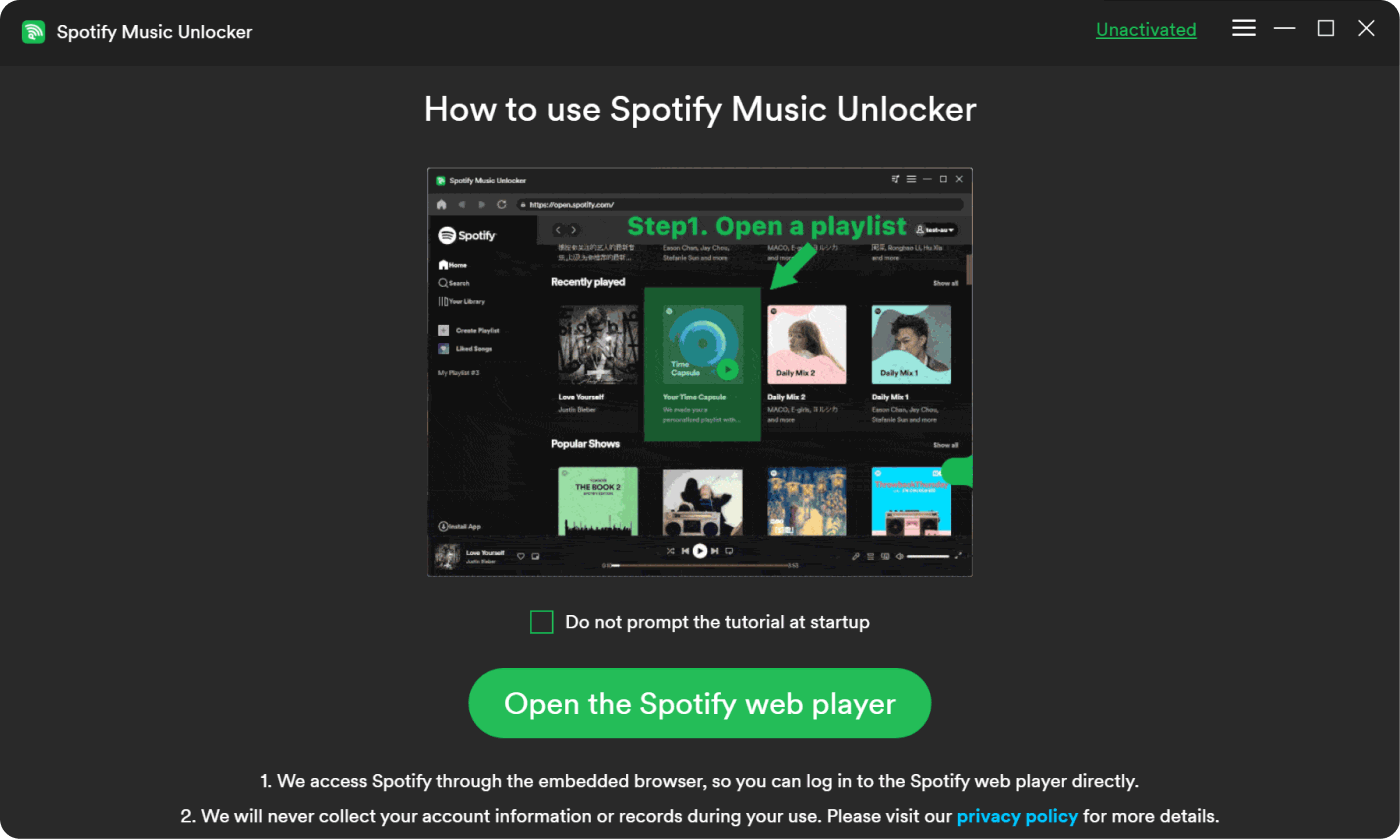
Step #1. Once the Spotify Music Unlocker has been launched, immediately tap the “Open the Spotify web player” option on the screen.
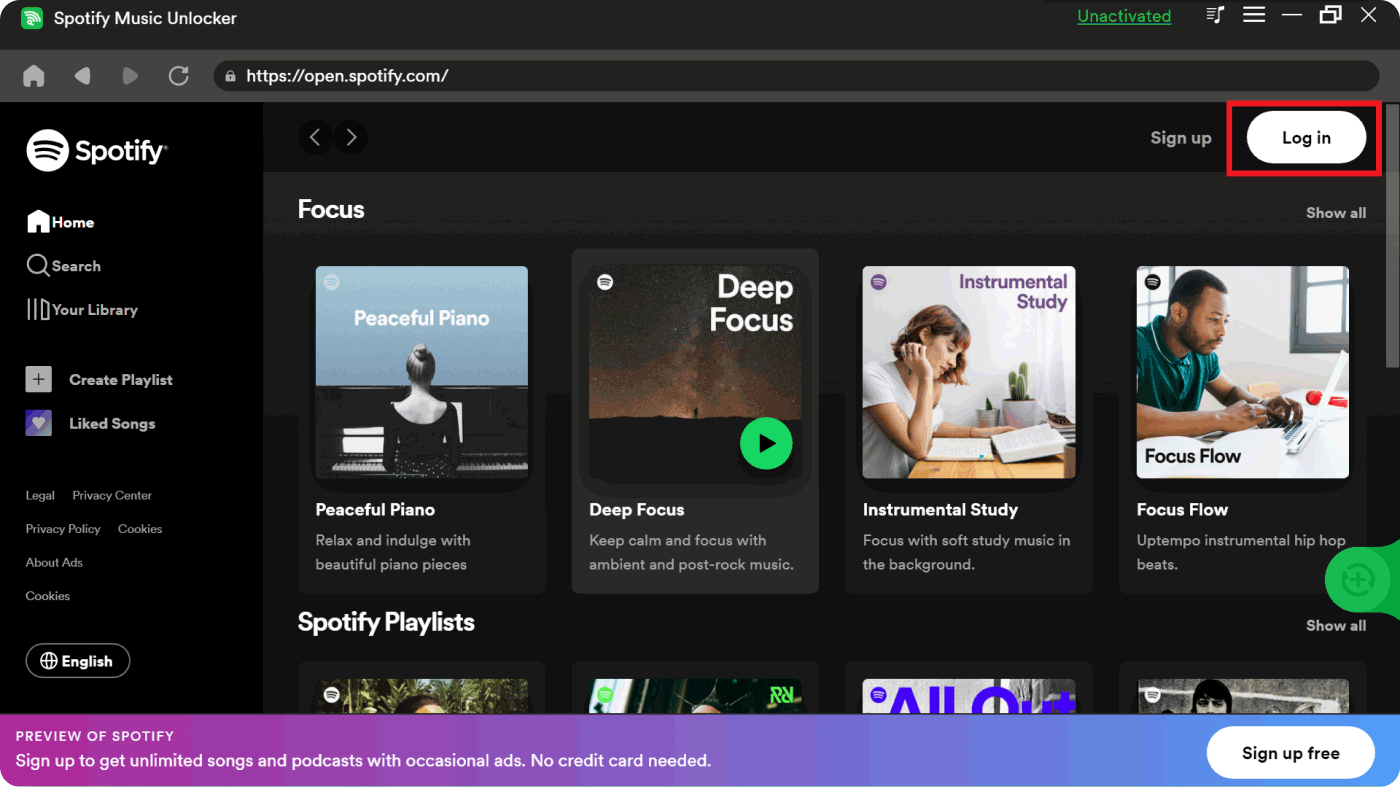
Step #2. Log into your Spotify account by tapping the “Log in” option and providing your account details. If you don’t have an account yet, just press the “Sign up” menu instead.
Step #3. Choose which Spotify content you’d like to process. For playlists, just select them and then press the green “add” icon on the screen to add all the songs in them to the platform. Alternatively, dragging and dropping them can also be done. Processing a single song should also be fine and acceptable.

Having duplicated songs won’t be possible as they can be detected by Spotify Music Unlocker.
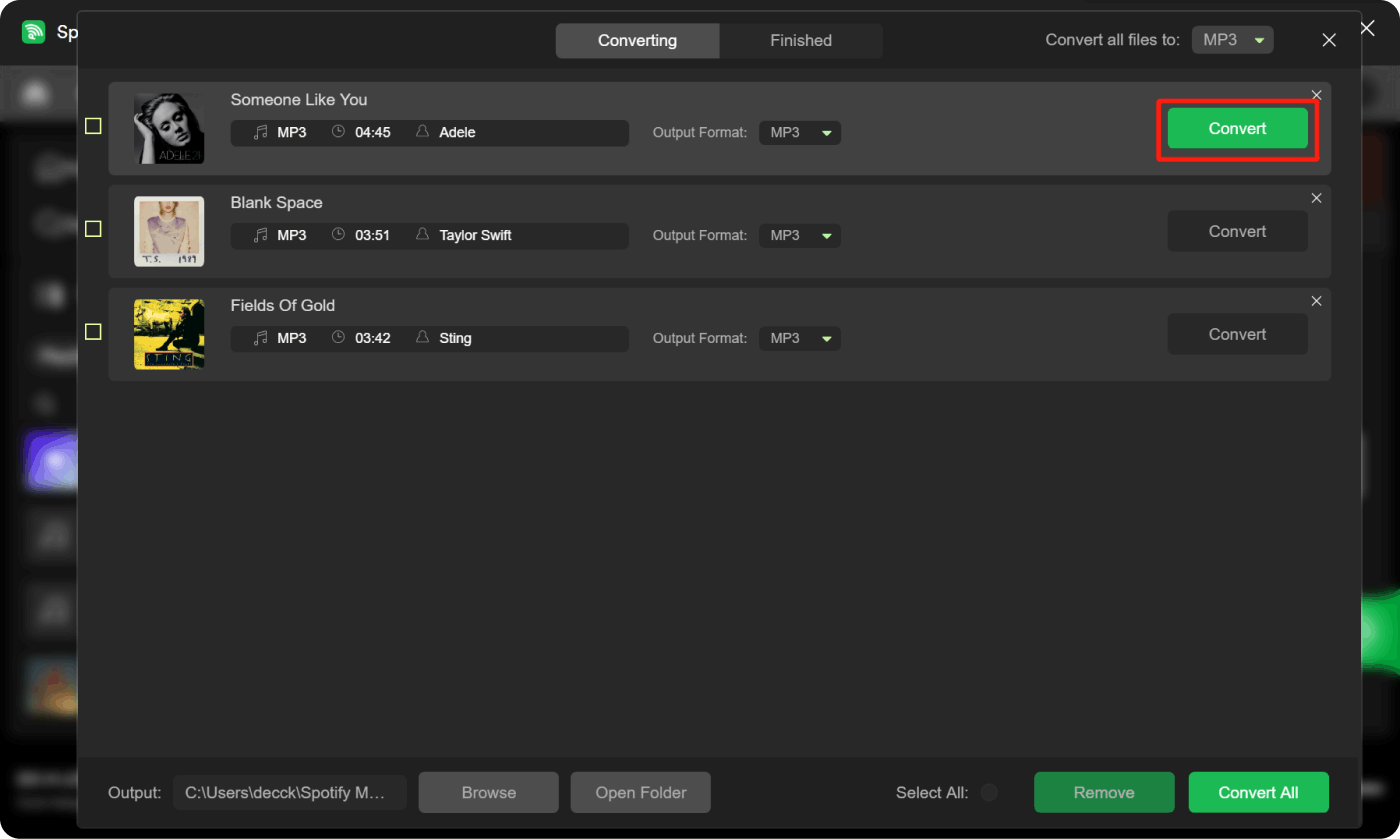
Step #4. Set up the output format and output folder that you’d like to use.
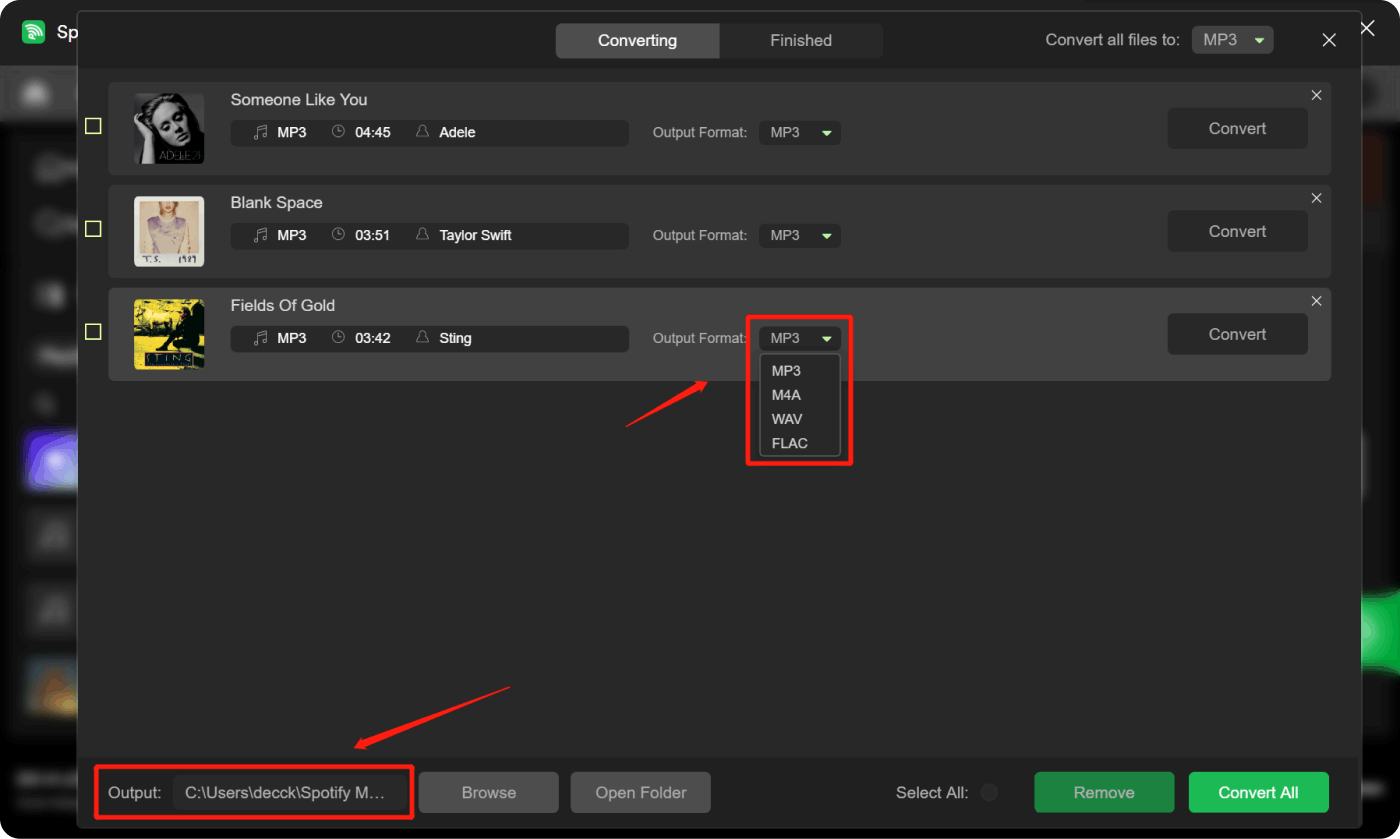
Step #5. Select a single track or multiple ones and then tap the “Convert” menu. If you’d like all songs to be processed simultaneously in one go, then you have to choose the “Convert All” menu instead.
Once the conversion process is over, viewing the processed songs should be easy. You just have to go to the “Finished” module and then tap the “View Output File” menu. All your converted Spotify tracks will be displayed here. These songs shall now be free from DRM protection and can now be accessed anywhere!
Part 4: Summary
To transfer iTunes playlists to Spotify, you can always refer to the guides that we have shared in this post. Those are so easy to perform that even first timers won’t find them hard to deal with.
If, in any case, you also happen to be interested in how you can save and keep your favorite Spotify song with you forever, always remember that you can unlock and convert them via the help of reliable tools such as the Spotify Music Unlocker.
People Also Read Convert Spotify to MP3 for Offline Listening [2024 GUIDE] SOLVED: How to Download Spotify Songs without Premium
Written By Rosie
Last updated: 2023-07-20