


In today's digital age, music is an essential part of our lives, and portable devices like iPods have become our trusted companions for enjoying our favorite tunes anytime, anywhere. If you're an Amazon Music subscriber and want to take your music collection with you on your iPod, you've come to the right place.
You might know how to play Apple songs on iPod. But in this article, we'll provide you with step-by-step instructions on how to download Amazon Music to iPod, allowing you to enjoy your favorite tracks offline. Whether you're a music enthusiast or a casual listener, our comprehensive guide will ensure a smooth and straightforward process. So let's dive in and unlock the world of Amazon Music on your iPod!
Contents Guide Part #1: Is the Amazon Music App Available on iPod Devices?Part #2: How to Download Amazon Music to iPod: The Best Method to UseConclusion
Part #1: Is the Amazon Music App Available on iPod Devices?
Before we talk about how to download Amazon Music to iPod, we’ll talk about the availability of the app on iPod devices. No, the Amazon Music app is not available on iPod. The app is only available for iOS devices, such as the iPhone, iPad, and iPod touch.
Transfer Purchased Amazon Music Tracks to iPod Using iTunes
However, you can still listen to Amazon Music on your iPod by downloading the songs or albums that you want to listen to from Amazon Music and then transferring them to your iPod using iTunes.
Here are the steps on how to transfer Amazon Music songs from your computer to iPod using the iTunes app:
- Download and install the latest version of iTunes on your computer.
- Connect your iPod to your computer using a USB cable.
- Open iTunes and click on the "Devices" icon in the top left corner of the window.
- Click on the "Music" tab in the iTunes window.
- Select the songs or albums that you want to transfer to your iPod.
- Click on the "Add" button and then select "Add to [Your iPod Name]" from the drop-down menu.
- Once the songs or albums have been transferred, you can disconnect your iPod from your computer.
Part #2: How to Download Amazon Music to iPod: The Best Method to Use
To download Amazon Music to iPod, you can use Amazon Music Unlocker. This will help you grab tracks from Amazon Music and convert them to AAC, MP3, WAV and FLAC. Once you have the music files, you can import them to your library on iTunes and then sync them to your iPod.
Here’s how to do that:
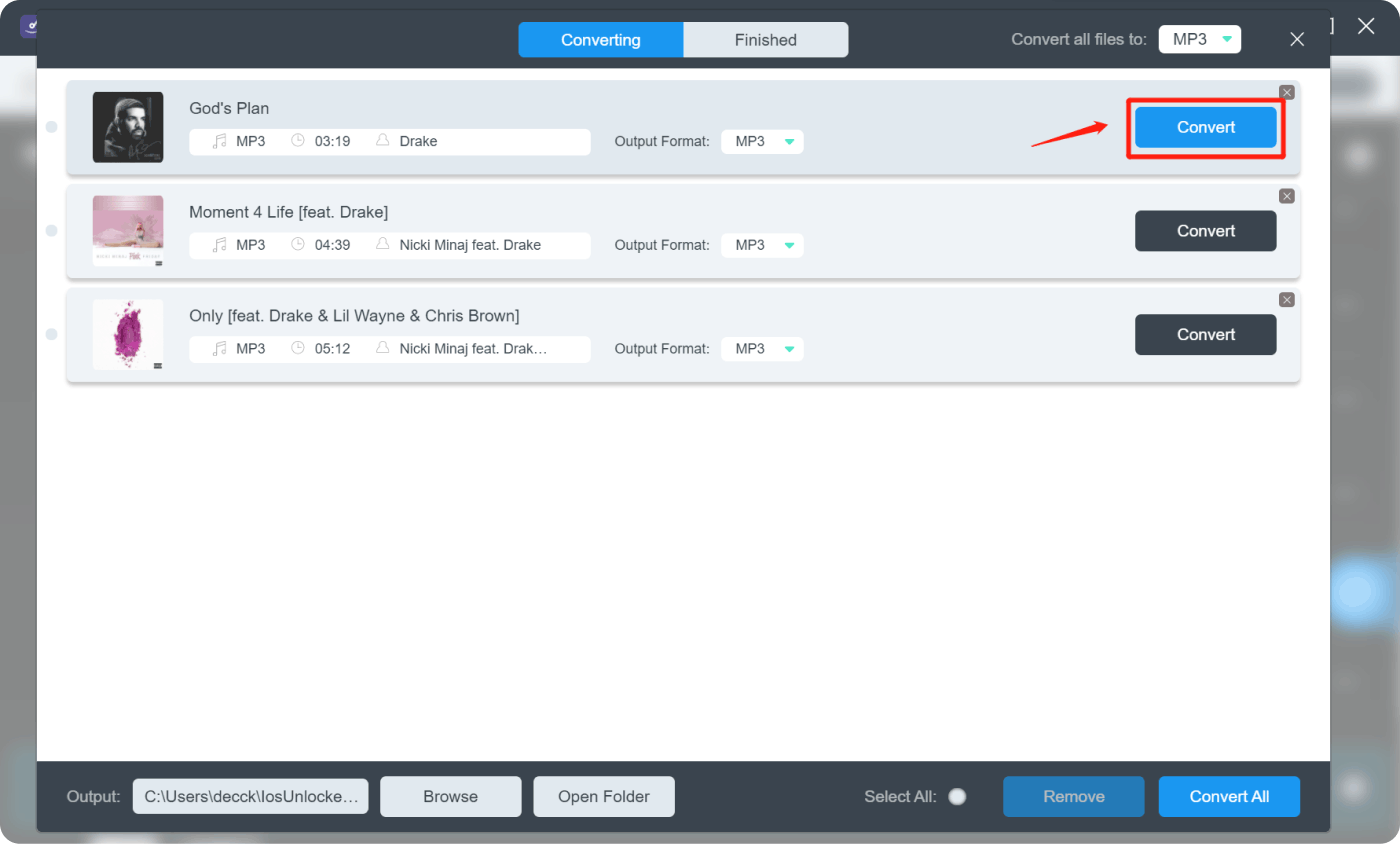
Step #1: Use Amazon Music Unlocker to Grab Tracks from Amazon Music
- Begin by downloading, installing, and launching the Amazon Music Unlocker application on your device.
- Once the application is open, click on the "Open the Amazon Web Player" option within the Amazon Music Unlocker interface.
- In the Amazon online player that appears, click on the "Sign In" button and provide your login credentials to access your account.
- Locate the desired playlist and add all the music within it to the conversion list by clicking on the blue "+" symbol. Alternatively, you can simply drag the playlist title onto the blue symbol.
- For individual tracks, drag the specific track title onto the blue "+" symbol to add them to the conversion list.
- Select the desired output format for the converted files, such as MP3, M4A, WAV, or FLAC. Additionally, you can specify the output folder where the converted files will be saved.
- Once you have chosen the songs you want to convert from the list, initiate the conversion process by clicking on the "Convert" button.
Step #2: Import Music Files from Your Local Folder on the Computer to iTunes
- Open iTunes on your computer: Launch the iTunes application by clicking on its icon in the dock (Mac) or the Start menu (Windows). If you don’t have iTunes installed, you can download it from the Apple website.
- Locate your music files: Open the local folder on your computer where your music files are stored. This could be your Downloads folder, Music folder, or any other location where you have saved your music files.
- Select the music files: Use your file explorer (Finder on Mac or File Explorer on Windows) to select the music files you want to import into iTunes. You can select multiple files by holding down the Ctrl (Windows) or Command (Mac) key while clicking on the files.
- Drag and drop the files into iTunes: With the selected music files still highlighted, drag them from the file explorer window and drop them directly into the iTunes window. You can drop them into the “Music” section or create a new playlist by dropping them into the sidebar on the left.
- Wait for the import process: iTunes will start importing the music files into your library. The time it takes will depend on the number and size of the files. You can monitor the progress in the iTunes status bar.
- Verify the imported music: Once the import process is complete, you can verify that the music files have been successfully added to your iTunes library. Navigate to the “Music” section or the playlist where you dropped the files and look for the imported songs.
Step #3: Sync iTunes on Your Computer to Your iPod to Sync Music Library
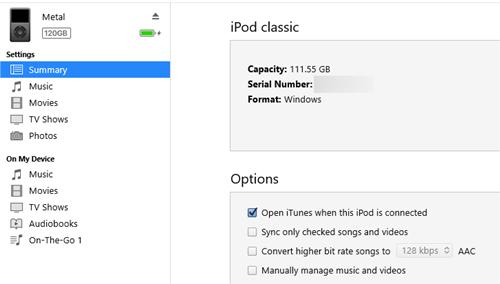
- Connect your iPod to your computer: Use the USB cable that came with your iPod to connect it to your computer. Ensure that your iPod is recognized and appears as a connected device in iTunes.
- Open iTunes and select your iPod: Launch iTunes on your computer if it doesn’t open automatically. In the top-left corner of the iTunes window, you’ll see an icon representing your iPod. Click on it to select your iPod.
- Configure sync settings: In the main iTunes window, you’ll see various tabs at the top. Click on the “Music” tab to access the music sync settings. Here, you can choose to sync your entire music library or selected playlists, artists, albums, or genres.
- Select the desired music to sync: Depending on your preference, choose whether to sync your entire music library or specific playlists, artists, albums, or genres. You can also choose to include music videos if desired.
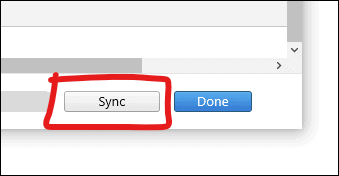
- Start the synchronization process: Once you’ve made your selection, click on the “Apply” or “Sync” button located in the bottom-right corner of the iTunes window. iTunes will begin syncing the selected music from your computer to your iPod.
- Wait for the sync to complete: The time it takes to sync will depend on the amount of music being transferred and the speed of your computer and iPod. Ensure that the sync process is complete before disconnecting your iPod.
- Safely disconnect your iPod: Once the sync is finished, you can safely disconnect your iPod from your computer. In iTunes, click on the eject icon next to your iPod’s name or right-click on your iPod and select “Eject” to ensure that no data is lost.
- Enjoy your synced music on your iPod: Your iPod is now updated with the music from your iTunes library. Disconnect it from your computer, put on your headphones, and enjoy your synced music library on the go.
By following these steps, you can easily download Amazon Music to iPod, ensuring that you have access to your favorite songs and playlists whenever and wherever you go.
Users of Amazon Music Unlocker can convert the format of their Amazon Music tracks into a variety of other formats, including MP3, FLAC, and WAV. Users can play their converted audio files on a variety of gadgets and media players thanks to this versatility.
Because the software enables lossless conversion, the original audio quality of the music from Amazon Music is maintained throughout the conversion process. As a result, consumers can continue to enjoy the same high-quality sound even after the files have been converted.
The ID3 tags and metadata connected to the tracks from Amazon Music are kept by Amazon Music Unlocker. This contains crucial details including the artist, album, song title, and album cover. This aids users in keeping their libraries organized.
People Also Read How to Set Ringtone from Amazon Music: The Ultimate Guide Download Amazon Music to Computer: 2024 Ultimate Guide
Conclusion
In conclusion, download Amazon Music to iPod allows you to enjoy your favorite tunes wherever you go. We explored the step-by-step process of downloading Amazon Music to your iPod, ensuring a seamless experience.
By following the instructions provided, you can easily import your purchased Amazon Music songs into iTunes and sync them to your iPod. This enables you to create a personalized music library on your iPod, filled with your favorite tracks, playlists, and albums.
To implement that, you have to use Amazon Music Unlocker to grab the tracks from Amazon Music for transfer to your iPod. Amazon Music tracks are DRM-protected, which means that they can only be played on the Amazon Music app or on devices that are authorized by Amazon. Amazon Music Unlocker removes the DRM protection from Amazon Music tracks, so you can convert them to any format that you want.
Once you have converted your Amazon Music tracks to a different format, you can play them on any device that supports that format. This includes MP3 players, smartphones, tablets, computers, and more.
Written By Rosie
Last updated: 2023-05-31